Exploiting the iPhone 4, Part 4: Investigating the Ramdisk
Reading time: 7 minutes
gala
This series follows along as I build gala, an iOS 4 jailbreak for the iPhone 4.
- Part 1: Gaining Entry
- Part 2: Bypassing the Boot Chain
- Part 3: Patching the Boot Chain
- Part 4: Investigating the Ramdisk
- Part 5: Flashing the Filesystem
- Part 6: Post-boot Paradise
|
|
|
|---|
On with the show...
Recovering firm footing
Eventually, I managed to glean the structure of what happens next:
- The Restore ramdisk contains a traditional, but heavily trimmed down, OS distribution. It has all the fun directories, like
/usr/sbin/and/System/Library/PrivateFrameworks/. It also ships with some standard UNIX utilities, such as/bin/cat✱. - The kernel loads and executes
/etc/rc.bootfrom the ramdisk to drive the next piece of work. Remarkably, this is not a text file! It’s actually a Mach-O embedding a program tantamount to the following:
✱ Note
uname or touch, are missing from the ramdisk./etc/rc.boot
fn main() {
    if !getfsfile("/") || !mount("/") {
        reboot();
    }
    umask(0);
    [
        "/usr/local/bin/restored_external",
        "/usr/local/bin/restored_update",
        "/usr/local/bin/restored",
        "/usr/libexec/ramrod/ramrod",
    ].map(|path| execl(path));
    reboot();
}
Interestingly, the only one of those paths that actually exists within our ramdisk is /usr/local/bin/restored_external✱.
✱ Note
restored_external binary entirely with an unrelated program, as a means of getting their code to run when the system loads. This makes sense, as it’s a convenient and reliable jumping-off point. I think these people could’ve just as easily extended /etc/rc.boot to launch their program, instead of hijacking an existing one, but I do think their approach is quite fun!Taking a closer look at restored_external, it’s clear that this is the main driver for the device restore process. restored_external kicks off and coordinates several important pieces of work:
- Writing disk partitions to the GPT and setting up new filesystems.
- Wiping the encryption key from the previous installation’s user data partition, rendering it unrecoverable.
- Communicating logs from any previous failed restore attempts.
- Mounting the new partitions and flashing the OS image.
- Setting up the user data partition.
- Updating the persistent boot arguments stored in NVRAM.
- Flashing the new bootloader chain to NOR.
- Creating a new system keybag.
- Updating the device’s baseband.
Throughout this process, restored_external will talk to software on the host Mac, keeping it abreast of the progress so far. restored_external also relies on the host Mac to receive the IPSW data that the restore process will flash to the device (such as the root filesystem, baseband firmware, bootchain, etc).
Normally, this software running on the host would be Apple-owned code such as iTunes or Finder, but folks have done great work reverse engineering these protocols and providing open-source implementations. In this case, I’m using a hacked up fork of idevicerestore that reuses the internals to do the exact work that gala needs.
restored_external sends its progress reports, and requests the next piece of the IPSW, using structured commands sent over a USB tunnel to and from the host.
Here’s what restored_external sends when it’s letting the host know that it’s next going to repartition the device’s disk:
<?xml version="1.0" encoding="UTF-8"?>
<!DOCTYPE plist PUBLIC "-//Apple//DTD PLIST 1.0//EN" "http://www.apple.com/DTDs/PropertyList-1.0.dtd">
<plist version="1.0">
<dict>
	<key>MsgType</key>
	<string>ProgressMsg</string>
	<key>Operation</key>
	<integer>11</integer>
	<key>Progress</key>
	<integer>-1</integer>
</dict>
</plist>
restored_external letting the host know that it’s about to flash the filesystem:
<?xml version="1.0" encoding="UTF-8"?>
<!DOCTYPE plist PUBLIC "-//Apple//DTD PLIST 1.0//EN" "http://www.apple.com/DTDs/PropertyList-1.0.dtd">
<plist version="1.0">
<dict>
	<key>MsgType</key>
	<string>ProgressMsg</string>
	<key>Operation</key>
	<integer>12</integer>
	<key>Progress</key>
	<integer>-1</integer>
</dict>
</plist>
Lastly, this is what it looks like when restored_external is asking for a chunk of IPSW during an image verification procedure:
<?xml version="1.0" encoding="UTF-8"?>
<!DOCTYPE plist PUBLIC "-//Apple//DTD PLIST 1.0//EN" "http://www.apple.com/DTDs/PropertyList-1.0.dtd">
<plist version="1.0">
<dict>
	<key>Command</key>
	<string>OOBData</string>
	<key>OOB Length</key>
	<integer>84</integer>
	<key>OOB Offset</key>
	<integer>72</integer>
</dict>
</plist>
restored_external sends a lot of commands to the host, and the host sends a lot of data back. It’s therefore pretty fascinating that every single message shuffled between the device and host contains so much redundant metadata about the XML schema. Do we really need to embed a URL describing the plist grammar in every one of these thousands of interchanges? Apple says… Yes!
There in a flash
Perhaps the most interesting work restored_external performs is flashing a new filesystem to NAND. This is where we’ll want to inject whatever modifications we’d like to make to the ‘final’ iOS distribution installed on the device.
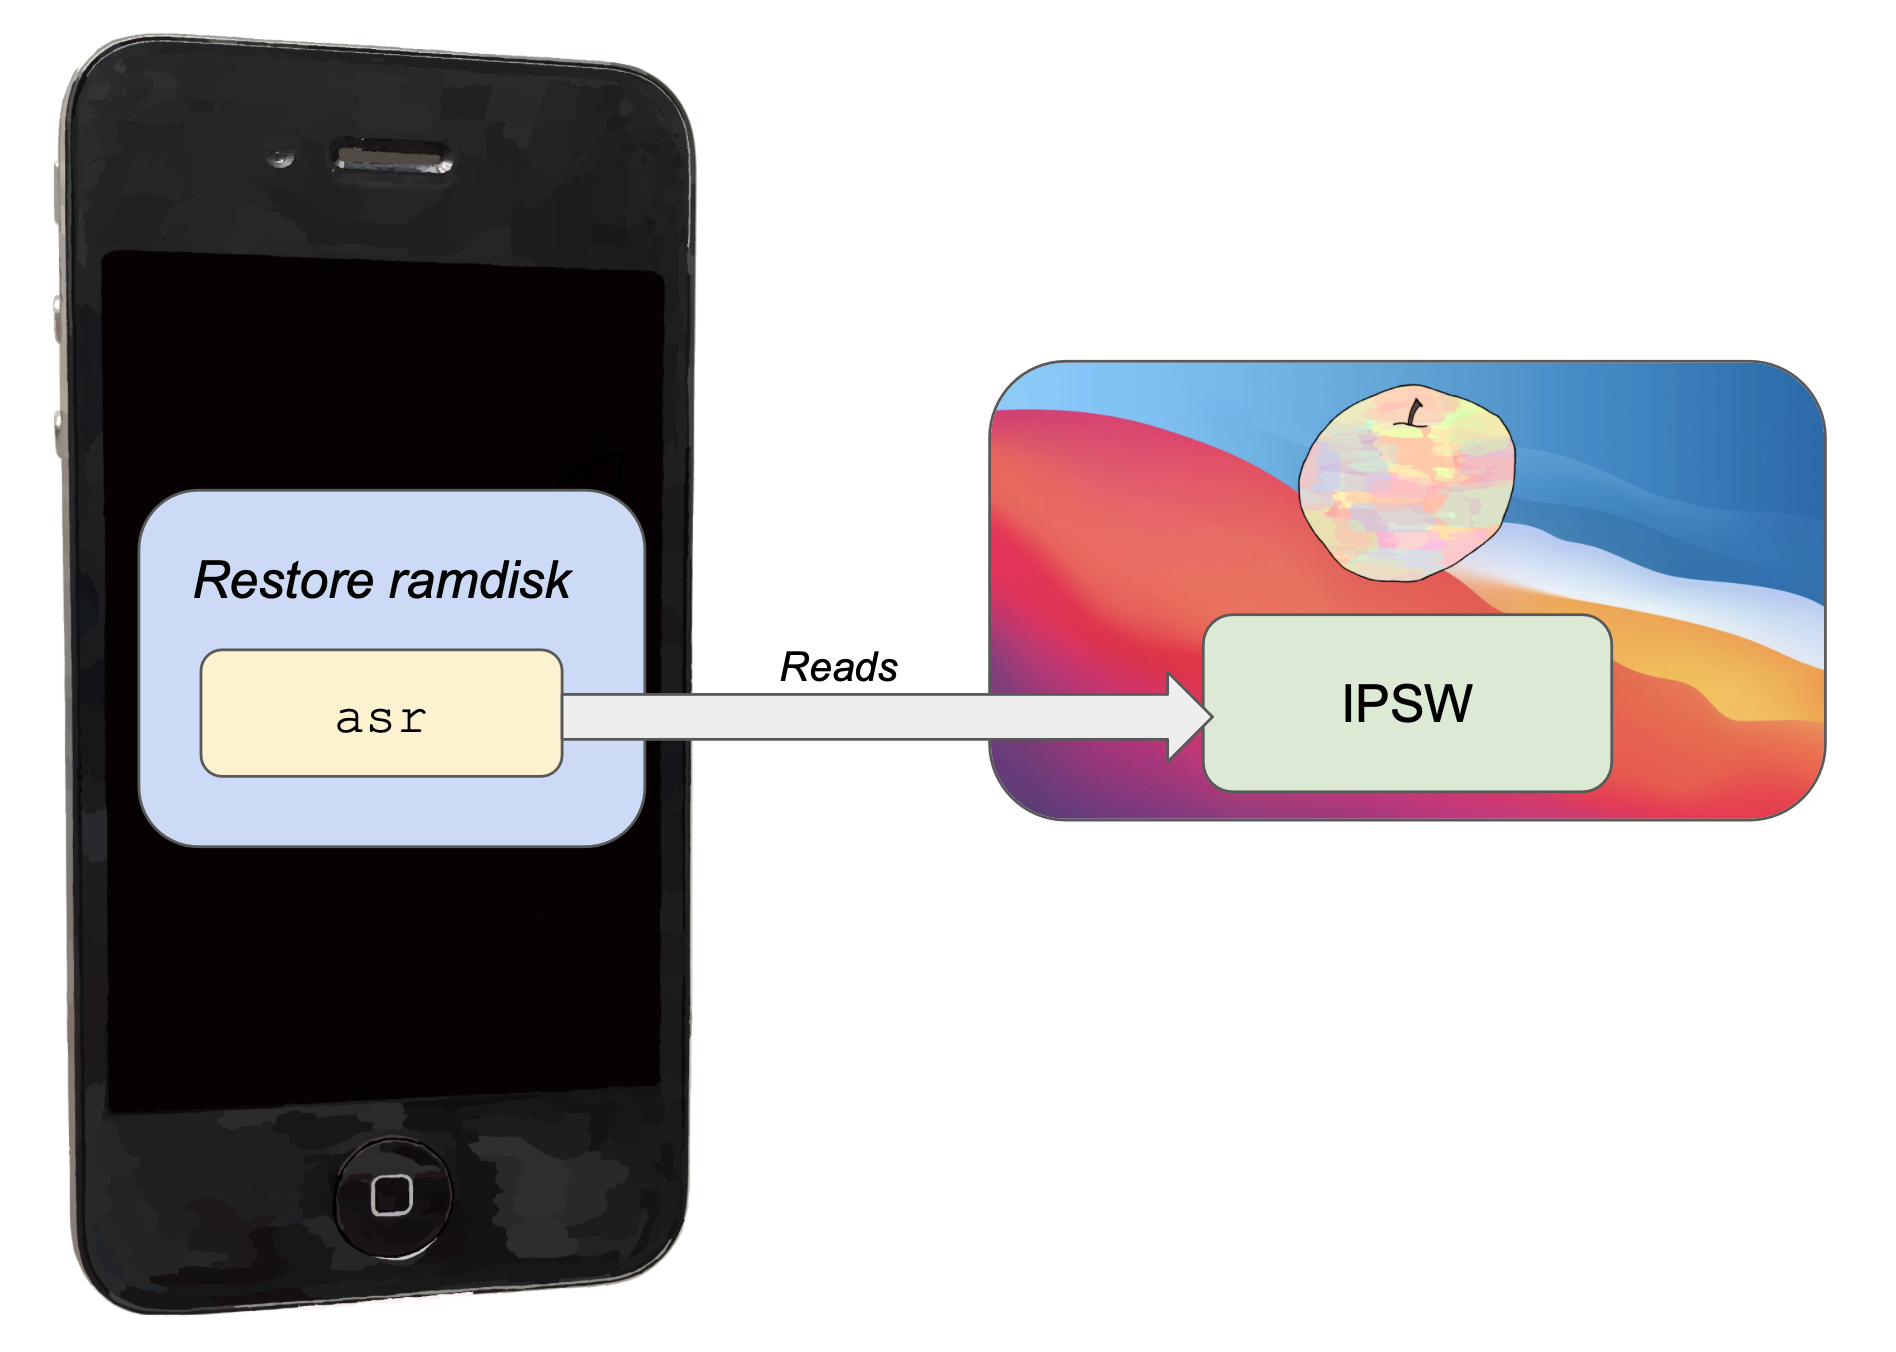
As it turns out, the code for this doesn’t live in restored_external at all. Instead, restored_external shells out to another program in the ramdisk, /usr/sbin/asr, with the following incantation:
/usr/sbin/asr -source asr://localhost:12345 -target /dev/disk0s1 -erase -noprompt --chunkchecksum --puppetstrings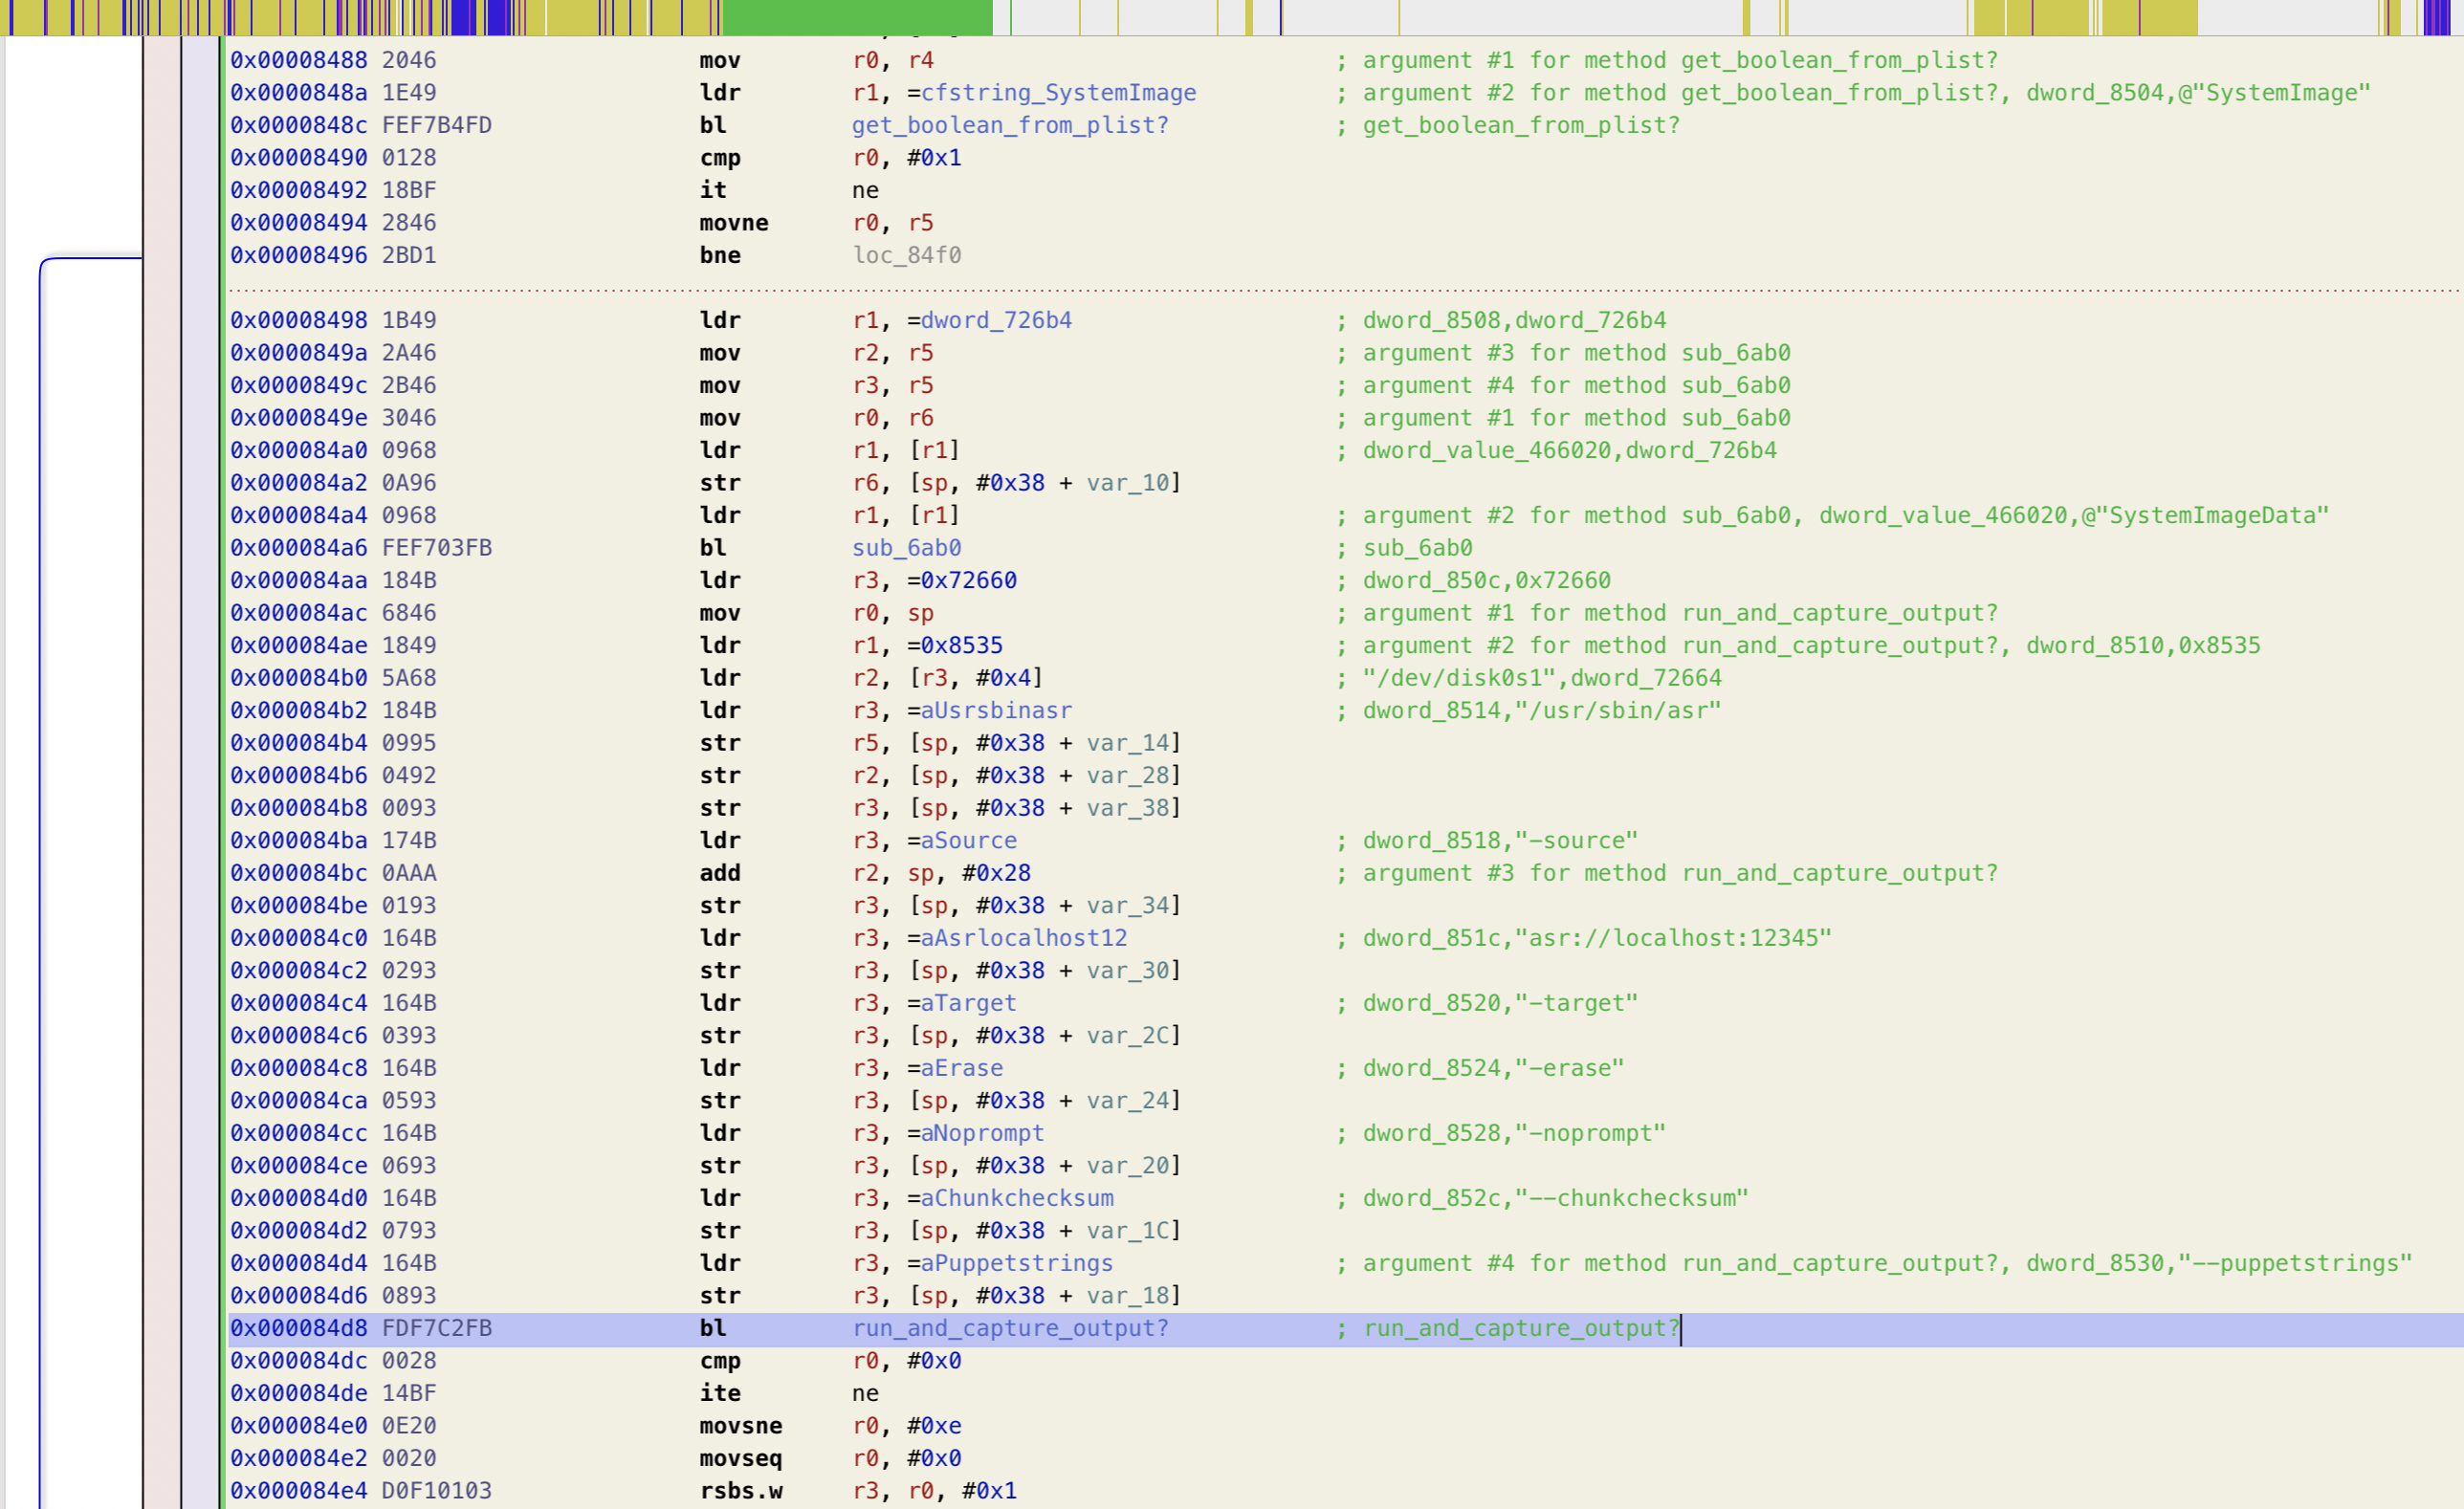
ASR, or Apple System Restore, contains the real meat of flashing the filesystem. It has two duties:
- Restoring the filesystem image.
- Verifying the filesystem image.
Once restored_external hands the reigns to asr, asr will take over the communications with the host and start requesting IPSW data.
Let’s give it a whirl! I’ll try invoking asr directly, and will start out by providing it with the original, unmodified IPSW data. We should expect this
to fail, at the very least because asr will see that the IPSW hasn’t been personalized for this device using the normal ECID/SHSH scheme.
Manipulating the ramdisk


$


Huh, Authentication error. Well, we’re no stranger to code signing by this point, let’s just fire up our disassembler and patch around it.
Firstly, we’ll need to set up some patching infrastructure like we’ve done already with the iBSS and iBEC.
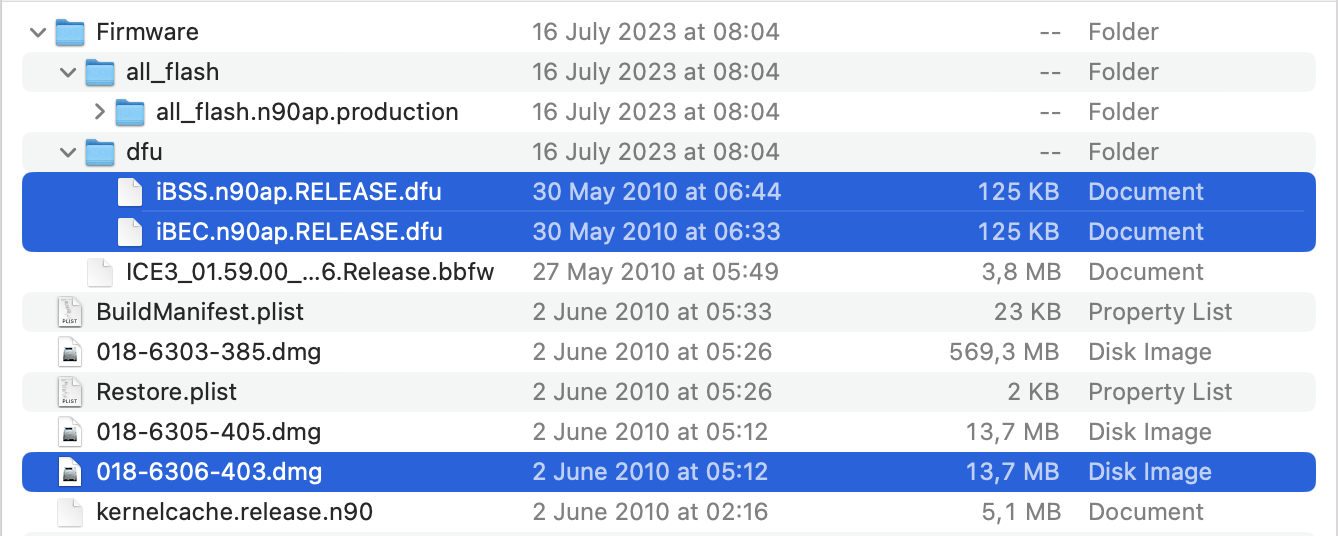
Unfortunately, things aren’t quite so straightforward anymore. The iBSS and iBEC are files that live just inside the unzipped IPSW, at /Firmware/dfu/iBSS.n90ap.RELEASE.dfu and /Firmware/dfu/iBEC.n90ap.RELEASE.dfu. Our asr binary, however, is embedded inside the packed Restore ramdisk image, stored at /018-6306-403.dmg within the IPSW. Our patching infrastructure will need to understand how to mount this .dmg, apply the Patch to a binary at some path within the mounted filesystem, and package the whole thing back up again into a .dmg.
Let’s introduce a new Patch wrapper that knows how to apply a patch to a binary stored in a .dmg. It’ll need to:
- Decrypt the
.dmgwith the correct key and IV, similar to the way we already decrypt the iBSS and iBEC images. - Resize the
.dmg, since.dmgshave a fixed size and we’ll be adding bytes to ours. - Mount the
.dmgto a temporary directory. - Find the binary we’re after within the mounted filesystem, and apply the usual
InstructionPatchesandBlobPatches. - Unmount the filesystem and package it back into a
.dmg. - Re-encrypt the
.dmgso the OS can load it like it expects.
Since we’ll eventually be making patches to several binaries within the ramdisk’s filesystem, we can make one small design choice upfront: we’ll introduce a new DmgPatchSet that handles the work of mounting and unmounting the .dmg, and will hand off to each ‘interior’ ramdisk patch. This way, we only need to mount and unmount the .dmg once, rather than forcing each patch that modifies a nested binary to be responsible for mounting and unmounting the parent .dmg.
iPhone3_1_4_0_8A293_patches/restore_ramdisk.py
restore_ramdisk_patch = DmgPatchSet([
    DmgBinaryPatch(
        binary_path=Path("/usr/sbin/asr"),
        inner_patch=PatchSet(
            # Back in familiar territory!
            name="Bypass image validation",
            patches=[...],
        ),
    ),
    DmgBinaryPatch(
        binary_path=Path("/usr/local/bin/restored_external"),
        inner_patch=BlobPatch(
            ...
        ),
    ),
])
With that out of the way, we’re now ready to try running our patched asr build that we’ve hacked up to try to get it to accept our unsigned OS image.
Kernel-enforced code signing
$
Oh AMFI, you sly devil. We’ll need to ask the kernel to let down its guards by disabling its code signing enforcement. With a quick glance at the kernel disassembly, creating the patches is straightforward:
iPhone3_1_4_0_8A293_patches/kernelcache.py
neuter_amfi_shellcode_program_addr = VirtualMemoryPointer(0x80966080)
PatchSet(
    name="Neuter AMFI",
    patches=[
        InstructionPatch(
            reason="""
                PE_i_can_has_debugger() checks a piece of static data to
                decide whether to allow unsigned code.
                While we could just overwrite the implementation of this
                method, many other code locations
                also check the contents of this same data location.
                For maximum flexibility, we'll instead embed a small
                program to set this word to 1.
            """,
            address=neuter_amfi_shellcode_program_addr,
            patched_instructions=ThumbInstructions(
                """
                    push {r0-r1}
                    # Address of the `debug_enabled` storage location.
                    # It's necessary to set this at runtime, rather than
                    # via a binary patch, because this address is
                    # located within the .bss section.
                    # The .bss is only described as a metadata pair of [base address, size]
                    # values in the binary, and just instructs
                    # the loader to fill this region with zeroes upon program load.
                    ldr r0, =0x8027986c
                    # Set *debug_enabled = 1.
                    mov r1, #1
                    str r1, [r0]

                    pop {r0-r1}
                    bx lr
                """
            ),
        ),
        InstructionPatch(
            reason="""
                Jump to our injected shellcode program just after the kernel starts up,
                to ensure the `debug_enabled` storage always passes when checked.
                We're just overwriting an informative log here
                (specifically, the "iBoot version: %s" string).
            """,
            address=VirtualMemoryPointer(0x801d5bea),
            orig_instructions=[Instr.thumb("bl #0x8001b25c")],
            patched_instructions=[Instr.thumb(f"bl #{neuter_amfi_shellcode_program_addr}")],
        ),
    ],
)
Perusing through AppleMobileFileIntegrity::start also makes it clear that we can pass some juicy boot flags for good measure:
iPhone3_1_4_0_8A293_patches/ibec.py
boot_args = ["amfi=0xff", "cs_enforcement_disable=1"]With that out of the way, the system will now happily load and run binaries with invalid code signatures. Here’s AMFI itself wearing a silly hat.

Let’s go back to trying to coax asr into accepting a non-kosher filesystem image.
$
Ah, it crashes shortly after we’ve nudged it around the basic block that leads to the Authentication error string. Any attempts I made to hack authentication out of this routine turned out to be futile. My understanding could be off base here, but I think this was tricky because the image verification happens inline with the image processing. In previous cases, I could just patch out a branch or ten and bypass the validation checks, then continue on my merry way. In this case, though, it appeared as though verification was too closely tied to data intake for the two to be cleanly severed.
Here’s a CFG from the relevant code illustrating the deeply nested logic.
