Exploiting the iPhone 4, Part 3: Patching the Boot Chain
Reading time: 17 minutes
gala
This series follows along as I build gala, an iOS 4 jailbreak for the iPhone 4.
- Part 1: Gaining Entry
- Part 2: Bypassing the Boot Chain
- Part 3: Patching the Boot Chain
- Part 4: Investigating the Ramdisk
- Part 5: Flashing the Filesystem
- Part 6: Post-boot Paradise
|
|
|
|---|
On with the show...
Table of contents
Hatching a patch
One thing that I initially found quite surprising about this whole process is that, with this approach of breaking each successive stage’s image validation and uploading patched images, the system we’re booting is arguably no longer iOS. It’s a custom OS distribution that’s very similar to iOS, but is based on custom firmware images that are essentially authored by the jailbreak developer when they apply their patches.
To my sensibilities, this makes this approach to jailbreaking less of a “pure” jailbreak than exploiting and modifying a running system post-hoc, once it’s already booted. Imposter syndrome finds incredible means to justify one’s exclusion.
We’ve got all the infrastructure in place to load a patched iBSS. The next step is to decide what to patch!
Our goal is that, after our patches, the iBSS will agree to load an iBEC which we’ve also modified. Therefore, we’re going to want to mess with whatever logic in the iBSS decides whether a code signature should be accepted or not.
This logic isn’t too difficult to find: the iBSS contains many more strings than the SecureROM. Looking at what strings are present, and where they’re used, is invaluable for getting your bearings.
Pretty quickly, we come across a family of functions that clearly contain the logic we’ll want to target:
image3_load_decrypt_payloadimage3_load_validate_constraintsimage3_validate_signature
The code often panics when one expectation or another isn’t upheld, and the call to panic includes the function name in which the panic occurred. This makes it really straightforward to find these functions!

Now, we need to do a few things at once:
- Create a way to apply patches to our iBSS image.
- Write some scaffolding to cleanly apply our iBSS patches, rerun our exploit, and upload and jump to the patched iBSS.
- Create a way to observe the iBSS execution, so we can better understand how our patches are modifying the behavior of the program.
A little bit of tooling will have a big impact on the ease of development here. We’ll want to define the image types we’ll work with, where they sit within an OS image, what decryption keys we should use with them, and other bits of IPSW bookkeeping. First up, let’s define the device models we know about.
os_build.py
class DeviceModel(Enum):
    iPhone3_1 = auto()
Next, we’ll encode the different images that we care about in the IPSW. For now, this is just the iBSS and iBEC, but over time this will grow to include other files we’ll want to patch, such as the kernel.
Binaries are normally packaged in an object file format, such as ELF or Mach-O, that describes to the loader exactly where in the virtual address space the code should be loaded. The iBSS and iBEC communicate with no such loader, though: they’re mapped directly into memory and executed from there. Therefore, they don’t contain any metadata within the file itself about where they expect to be loaded within the virtual address space. We need to hard-code their expected virtual addresses. This will be important when applying our patches, so the patcher knows where within each file to write our modified code to!
os_build.py
class ImageType(Enum):
    iBSS = auto()
    iBEC = auto()

    @property
    def base_address(self) -> VirtualMemoryPointer:
        return TotalEnumMapping({
            ImageType.iBSS: VirtualMemoryPointer(0x84000000),
            ImageType.iBEC: VirtualMemoryPointer(0x5ff00000),
        })[self]
Next, we’ll define the OS builds that we can handle. OS builds are tied to a device model, so we’ll include a mapping to keep track. We’ll also include some logic to find a given image type within an OS build.
os_build.py
class OsBuildEnum(Enum):
    iPhone3_1_4_0_8A293 = auto()
    iPhone3_1_4_1_8B117 = auto()

    @property
    def model(self) -> DeviceModel:
        return TotalEnumMapping({
            OsBuildEnum.iPhone3_1_4_0_8A293: DeviceModel.iPhone3_1,
            OsBuildEnum.iPhone3_1_4_1_8B117: DeviceModel.iPhone3_1,
        })[self]

    def ipsw_path_for_image_type(self, image_type: ImageType) -> Path:
        return TotalEnumMapping({
            DeviceModel.iPhone3_1: TotalEnumMapping({
                ImageType.iBSS: Path("Firmware") / "dfu" / "iBSS.n90ap.RELEASE.dfu",
                ImageType.iBEC: Path("Firmware") / "dfu" / "iBEC.n90ap.RELEASE.dfu",
            }),
        })[self.model][image_type]
We’ll also need to keep track of the correct decryption keys for each (OS build, image type) pair.
os_build.py
@dataclass
class KeyIvPair:
    key: str
    iv: str


class KeyRepository:
    _BUILDS_TO_IMAGE_KEY_PAIRS = TotalEnumMapping({
        OsBuildEnum.iPhone3_1_4_0_8A293: TotalEnumMapping({
            ImageType.iBSS: KeyIvPair(
                key="...",
                iv="...",
            ),
            # ...
        }),
        # ...
    })

    @classmethod
    def key_iv_pair_for_image(cls, os_build: OsBuildEnum, image_type: ImageType) -> KeyIvPair:
        os_build_keys = cls._BUILDS_TO_IMAGE_KEY_PAIRS[os_build]
        return os_build_keys[image_type]
And now, the juicy bit: defining our patches!
Patching model
It’s worth briefly covering what our patches will do. In general, we’ll use patches to modify a few critical instructions to alter the program behavior. For example, an image validation routine might call some inner validation logic that returns 1 upon success. The code might do cmp r0, #1, and redirect control to the “image refused” path if this comparison fails. If we patch this instruction to cmp r0, r0, we’re guaranteeing that the comparison will always succeed, and therefore that the success path will invariably run.
Let’s take a look at how other contemporary software defines and distributes binary patches.
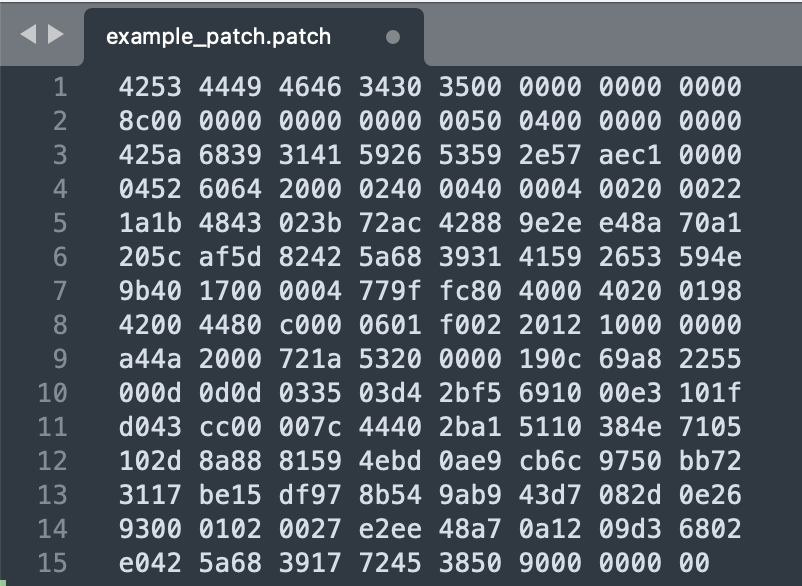
I appreciate brevity in writing, but this is just too far. This patch apparently encodes a compressed stream describing a series of edits in a very efficient format. It’s also absolutely inscrutable.
This kind of tooling seems quite useful when you have an existing binary, you’ve recompiled it to include some changes, and now want to distribute the diff to live systems. It seems like quite a poor fit for a use case in which I’m writing many test patches to try things out, and want to remember what the hell they do after I fill up my coffee.
Here’s the system I came up with.
Firstly, it turns out that there are a few distinct types of patches we’d like to apply!
An instruction patch is a ‘structured’ replacement of some original instructions with some replacement instructions, at a given virtual memory address. I tried to ensure the API enforces as much maintainability as possible. They look like this:
iPhone3_1_4_0_8A293_patches/ibss.py
    InstructionPatch(
        function_name="platform_early_init",
        reason="""
            The original logic loads a word from memory to find the
            value to pass to debug_enable_uarts().
            Override the value so that it's
            always 3, which is the setting for emitting logs over serial.
        """,
        address=VirtualMemoryPointer(0x84010B96),
        orig_instructions=[Instr.thumb("ldrb r0, [r4]")],
        patched_instructions=[Instr.thumb("movs r0, #3")],
    )
When the patcher runs, this will output something like the following:
Applying patch at 0x84010b96
   0x84010b96  Thumb(ldrb r0, [r4])
   Patch ----> Thumb(movs r0, #3)
I added validations out the wazoo for this. function_name and reason are purely documentation fields, to help encourage the patch-writer. The other fields are quite strict, though. The worst case for this sort of setup is that you’re declaring “oh yes, at so-and-so virtual address there’s these instructions that do X, and I’m going to replace them with Y”, and the code at that address doesn’t do that at all. Therefore, I tried to protect against this kind of bug.
- When applying the patch, I use Capstone to disassemble the original instructions. If they’re not an exact match to what’s mentioned in the patch, an error is raised.
- The replacement instructions are assembled with an ad-hoc assembler, because ad-hoc tooling of this sort is quite fun to write. To make sure there’s not a bug in the assembler, the assembled instructions are then disassembled with Capstone to make sure they exactly match what’s written in the patch, like we do for the original instruction bytes in the binary.
- I ensure that the patched instructions fit exactly into the number of bytes described by the original instructions. This helps protect against the patch accidentally writing out of bounds from what it was expecting to overwrite.
The second important kind of patch is a blob patch, which provides ‘unstructured’ byte replacement. This allows the patch writer to drop raw bytes at a given location, with no validation on what’s being overwritten or the contents of the patch. This can be quite useful when, for example, injecting a shellcode program that was generated elsewhere, or when replacing the contents of a file wholesale. Its usage is straightforward:
iPhone3_1_4_0_8A293_patches/ibec.py
    # Overwrite the boot arguments string
    boot_args = [
        # Boot from the ramdisk mounted at 'memory device #0'
        "rd=md0",
        # Send kernel logs over serial UART
        "serial=3",
        # Enable verbose boot
        "-v",
    ]
    BlobPatch(
        address=VirtualMemoryPointer(0x5ff19d68),
        new_content=f"{' '.join(boot_args)}\0".encode(),
    )
The last kind of ‘patch’ I’ll mention is a patch set. It acts like a Patch in the API, but it doesn’t do anything on its own. It’s just a container to logically group other patches. For example, you might have a series of patches that are all aligned with the goal of getting the binary to load unsigned images.
iPhone3_1_4_0_8A293_patches/ibec.py
    PatchSet(
        name="Load unsigned kernelcache",
        patches=[
            InstructionPatch(...),
            InstructionPatch(...),
            InstructionPatch(...),
        ]
    )
We’ve then got a collection of patches for each (OS build, image type) pair.
patcher.py
class PatchRepository:
    @classmethod
    def builds_to_image_patches(cls) -> Mapping[OsBuildEnum, Mapping[ImageType, list[Patch]]]:
        return TotalEnumMapping({
            OsBuildEnum.iPhone3_1_4_0_8A293: get_iphone_3_1_4_0_8a293_patches(),
            # ...
        })

    @classmethod
    def patches_for_image(cls, os_build: OsBuildEnum, image: ImageType) -> list[Patch]:
        image_patches_for_build = cls.builds_to_image_patches()[os_build]
        return image_patches_for_build[image]
The patcher’s flow goes like this for each image to patch in the targeted OS build:
- Decrypt the image using the stored key/IV pair, and save the image with a
.decryptedsuffix - Apply the patches to the decrypted image, and save the image with a
.patchedsuffix - Re-encrypt the image, and save the image with a
.reencryptedsuffix.
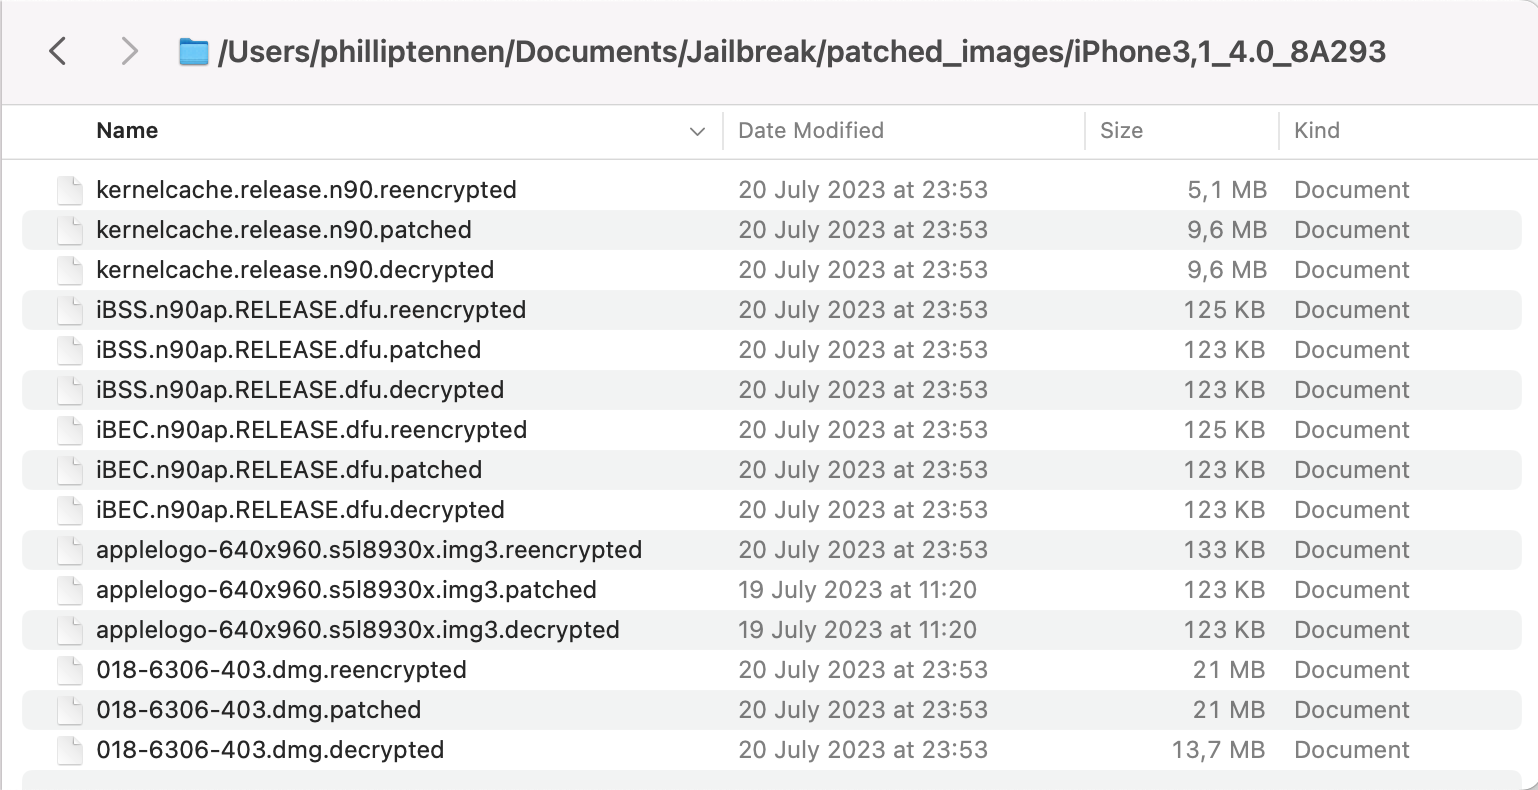
This results in a directory structure like this that’s regenerated each time I re-run the whole flow.
Writing our patches
We’ve managed to load a compromised iBSS thanks to our earlier SecureROM shenanigans, and we can now use this new capability to produce a patched iBSS that will accept a compromised iBEC.
We’re going to need to do some exploratory work to figure out exactly what we’ll need to patch, and where.
Taking a look at the strings defined by the iBSS, and where they’re referenced, gives us some pretty good clues as to where we’ll want to go.
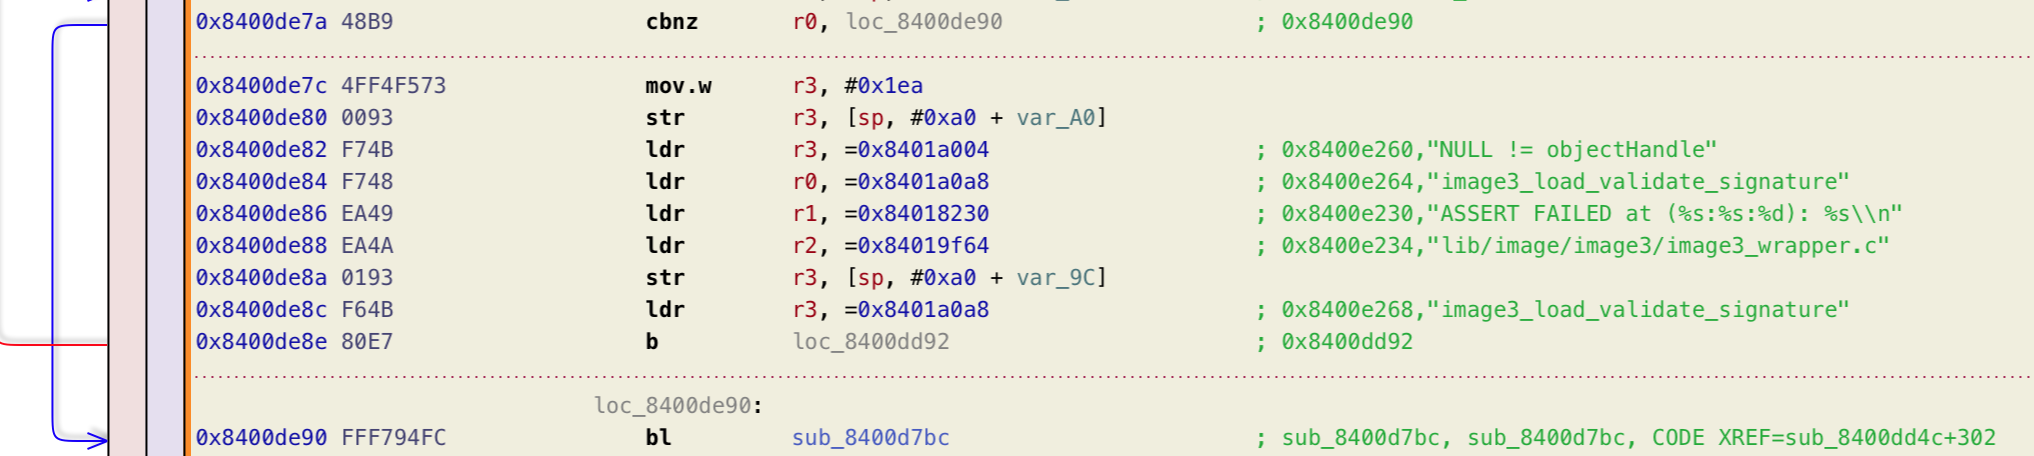
This string is pretty clearly used on an assertion for some failure path when validating an image’s signature. Let’s look around this function further to see if we can get a sense for what it’s doing.
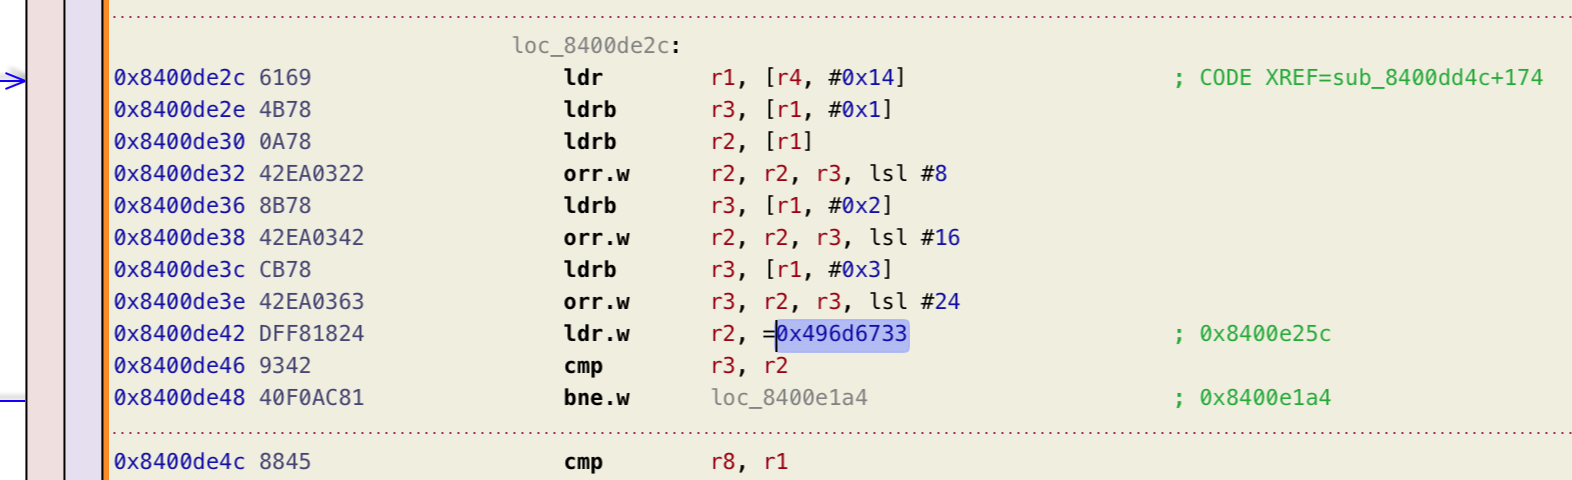
Interesting! We’re loading a word from memory, then comparing it to the constant 0x496d6733. Maybe this is some kind of magic value?
Indeed, 0x496d6733 is equivalently 49 6d 67 33, which is the ASCII string Img3 packed into four bytes. This code seems to be comparing some portion of the memory that’s been sent over USB to this magic value, presumably to check whether the file is in the img3 format that it expects. If the comparison fails, we branch away to a basic block at 0x8400e1a4 - let’s see what that does.

The full code that follows in the next basic block is a bit more wordy, but I’ll spare you the details: this is a failure path that returns -1 (0xffffffff in two’s complement). We now know that we want to avoid any branches that land us in this basic block!
Making our lives easier
Now, we should figure out which branches are causing us to fall into the failure path at runtime. Since the iBSS is a bit more sophisticated than the SecureROM, it also has some conveniences that we can make use of. From digging around the binary further, it’s clear that there’s a printf implementation which outputs its data over serial. If we’re able to call this printf implementation ourselves, we’ll be able to inject arbitrary logging at any point in the program, which will be super useful for tracking down behavior!
Let’s write a couple patches to try this out. I wrote another shellcode program that knows the exact address at which the printf function lives within the iBSS, and invokes it. It looks something like this:
ibss_payload.s
.text

.extern _c_entry_point

.pool
.set printf_addr, 0x84016fc9

.code 16
_start: .global _start
    push {lr}

    @ Preserve registers
    push {r0-r11}

    @ Call printf
    adr r0, msg
    ldr r11, =printf_addr
    blx r11

    @ Restore registers
    pop {r0-r11}
    pop {pc}

.align 2
msg:
.asciz "We can now inject logging at any point in the iBSS!\n"
Let’s inject it just after this Img3 constant comparison.
iPhone3_1_4_0_8A293_patches/ibss.py
    BlobPatch(
        address=VirtualMemoryPointer(0x8400de48),
        new_content=(PAYLOADS_ROOT / "ibss_shellcode").read_bytes(),
    )


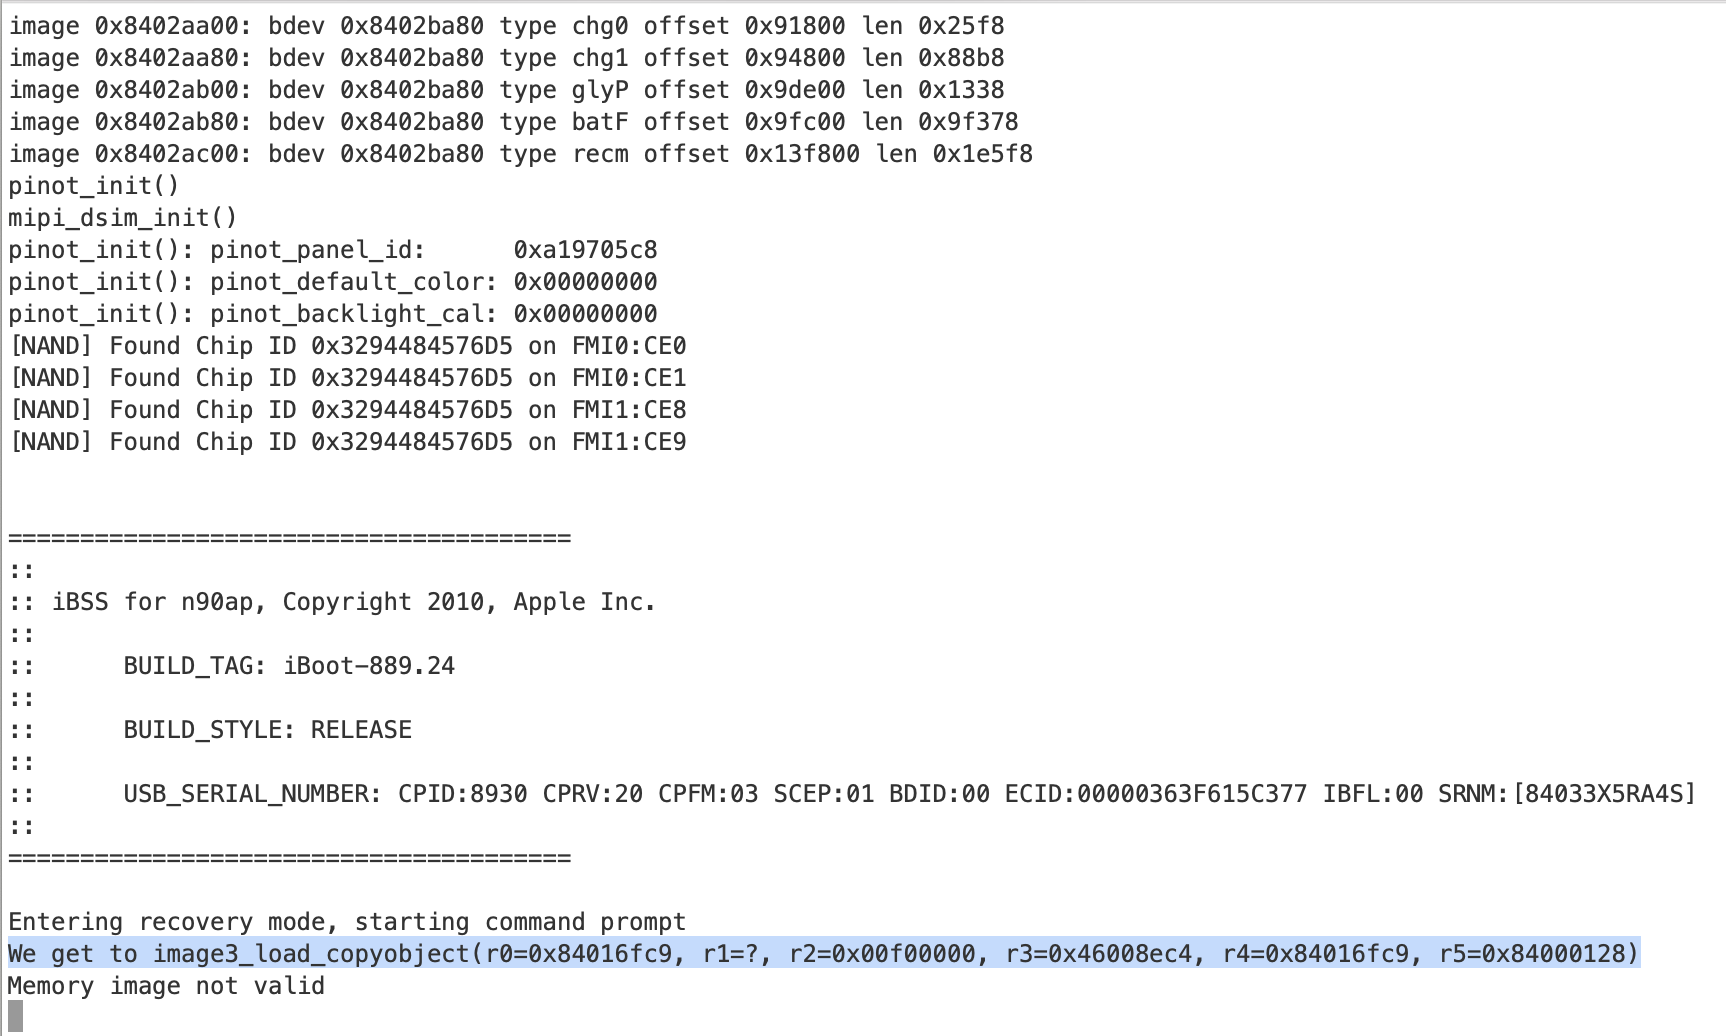
$


Uh oh, it crashed just after sending our log message! Let’s take a look in a disassembler to see exactly how our patch affected the binary.
Yeah, fair enough. Our patch overwrote instructions in the image load sequence with string data, resulting in nonsense that’ll typically do something illegal and reset in short order.
We’re going to need to insert our logging helper somewhere where we know it’s not overwriting anything important. We could find somewhere in the address space outside the iBSS image itself, but it’s a little tough to know which bits of the address space are being used for what. Much easier, though, is to find some space within the iBSS itself that we’re pretty confident isn’t being used for anything. We can then surgically embed a branch to this helper, without disrupting the larger structure of the surrounding code we want to inspect.
Remember the vanity message from earlier that the iBSS outputs on startup? It’s surrounded by a bunch of zero-data, and is actually a great spot to insert our program! We’ll just need to be careful that our program doesn’t grow too large, or else we’ll overwrite the non-zero data that comes next.
Also, our ‘structured’ InstructionPatch is great for documenting patches and making sure they do exactly what we expect, but it’s a bit high-overhead to use (by design). I also added an InstructionPatch.quick(address: VirtualMemoryPointer, instr_or_instrs: Instr | List[Instr]) that skips a lot of the validations for quicker prototyping.
iPhone3_1_4_0_8A293_patches/ibss.py
    shellcode_addr = VirtualMemoryPointer(0x840000fc)
    BlobPatch(
        address=shellcode_addr,
        new_content=(PAYLOADS_ROOT / "ibss_shellcode").read_bytes(),
    ),
    InstructionPatch.quick(0x8400de46, Instr.thumb(f"bl #{shellcode_addr}")),
Let’s give it a try!
$
Awesome!
This is more than enough to power us through finding and patching out the validations that fail for our invalid iBEC. To achieve our goal of convincing the iBSS to load a modified iBEC, a couple surgical tweaks are all we need:
iPhone3_1_4_0_8A293_patches/ibss.py
PatchSet(
    name="Load an unsigned iBEC",
    patches=[
        InstructionPatch(
            function_name="image3_load_decrypt_payload",
            reason="""
            Just above, the 'PROD' tag (0x50524f44) within the image is checked.
            This check fails for our patched iBEC.
            Patch the comparison so it looks like it succeeded.
            """,
            address=VirtualMemoryPointer(0x8400df14),
            orig_instructions=[Instr.thumb("cmp r0, #0")],
            patched_instructions=[Instr.thumb("cmp r0, r0")],
        ),
        InstructionPatch(
            function_name="image3_load_decrypt_payload",
            reason="""
            Just above, the 'ECID' tag (0x45434944) within the image is checked.
            Since the ECID is a per-device unique identifier, this is presumably checking that
            the firmware was personalized for this specific device.
            Let's ignore the failure and continue on the success path.
            """,
            address=VirtualMemoryPointer(0x8400e00c),
            orig_instructions=[Instr.thumb("cbz r0, #0x8400e02e")],
            patched_instructions=[Instr.thumb("b #0x8400e02e")],
        ),
    ]
)
$
This stuff is really satisfying.
One point of interest: if you do cause the iBSS to crash, preventing it from doing a ‘clean’ shutdown of the display via pinot_quiesce(), you get this disconcerting visual artifact as power drains from the display.
I can’t put my finger on it, but I’m getting “smoking kills” energy. Let’s move on.
While we could get started applying the same sort of patches to the iBEC now, so that our iBEC can load an unsigned kernelcache, I decided to play around in the iBSS environment a while longer.
It turns out the iBSS (and iBEC!) provide a ‘recovery shell’ that allows sending commands to the device over USB. The protocol is quite straightforward.
Uploading a file while the iBSS is running feels like an evolution of the same procedure with the SecureROM. As a refresher, images are uploaded to the SecureROM by:
- Sending the image in successive data packets, each with a maximum size of 1k bytes.
- Sending a magic sequence of USB control packets to ask the SecureROM to process the image.
With the iBSS (and iBEC to boot), the procedure for sending an image instead goes:
- Sending the image in successive data packets, each with a maximum size of 16k bytes.
- Sending a
0x40:0USB control packet with a shell command in the body. For example, sendinggo\0to the iBSS will ask it to load and run the uploaded iBEC.
Naturally, I added Device.upload_file(path: Path) which uses the correct protocol depending on what’s currently happening on the device, and provides Device.send_command(cmd: str) to easily send commands.
The iBSS provides several more interesting commands on top of go, though. bgcolor is a great one to make the device do something fun. Let’s give it a try!
$
Another interesting one is setpicture, which is typically used to show the Apple logo during boot. Like any good boot-ROM-based jailbreak, we’ll set a custom boot logo to really cozy up in the system.
Setting a custom boot logo
Just like the iBEC is signed and personalized for the device, so too are the images shown during different scenarios. We’ll need to add some more patches to coax the system into displaying an unsigned image. However, there’s nothing stopping us from showing one of the other images shipped in the IPSW. Here’s the graphic shipped in the IPSW at /Firmware/all_flash/all_flash.n90ap.production/batterylow0-640x960.s5l8930x.img3.
Showing some stock Apple images is cool, but much cooler is displaying arbitrary images. I found this way more difficult than loading an unsigned iBEC, and banged my head against it for a couple of days before getting it to work. We’re going to need to dive back into patching our iBSS to track down exactly where pictures are validated and rejected.
Logging "we got here!" strings is nice, but even more useful is being able to dump register state. This will allow us to, for example, load a valid image and an invalid image, and compare how registers differ at critical points. I updated the injected helper program to dump the register state over UART, and spent hours poring over the differences at various points when loading valid and invalid images. It’s worth noting that every time I make a change, I need to get the device to re-enter DFU mode, so I can repeat the whole flow. Holding down the Home and power buttons for 20 seconds, every time I made a change or wanted to test a different execution point, got really old.
I started tracking the register state at different execution points for valid and invalid images in a text file. I’d test a valid and invalid image, note the register states and which code path was taken, try a small patch here or there to influence things closer to the ‘valid image’ path, and try again and again and again. My notes looked like this:
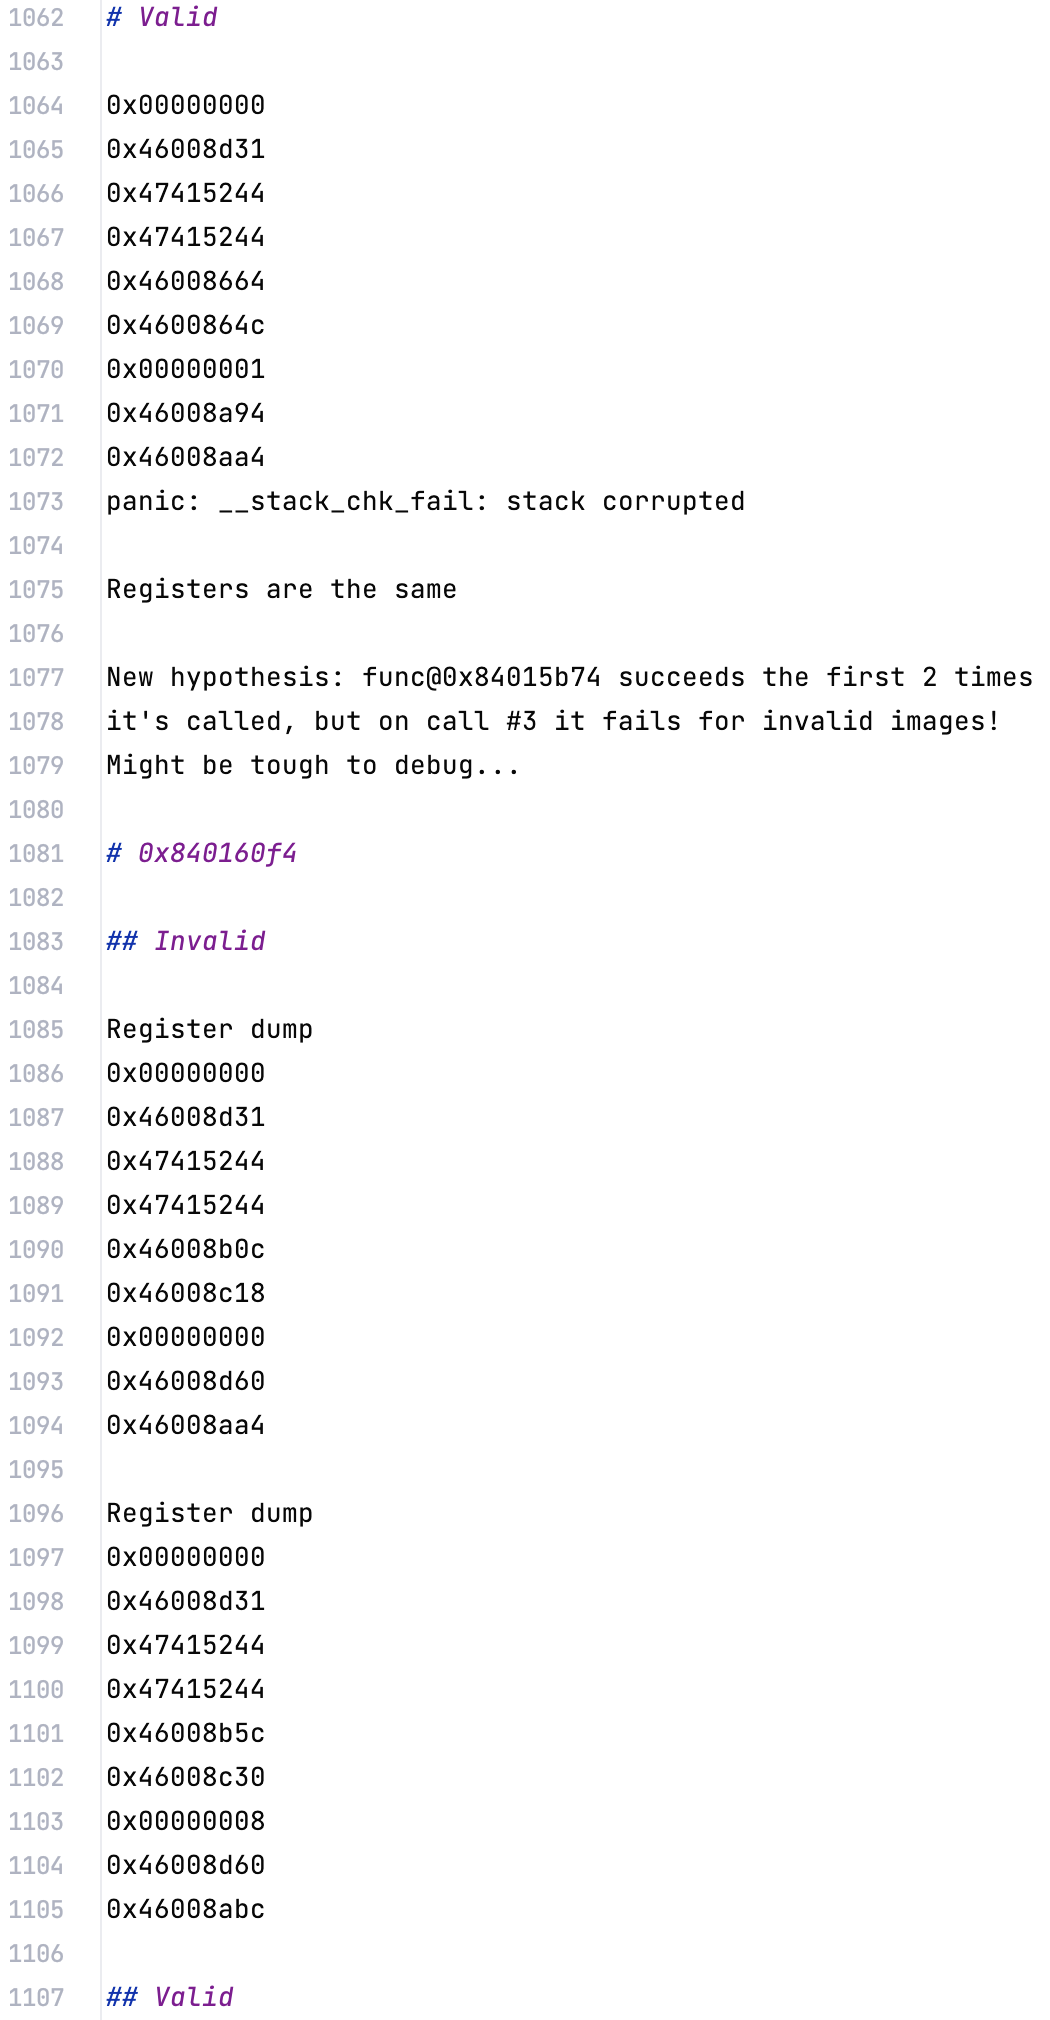
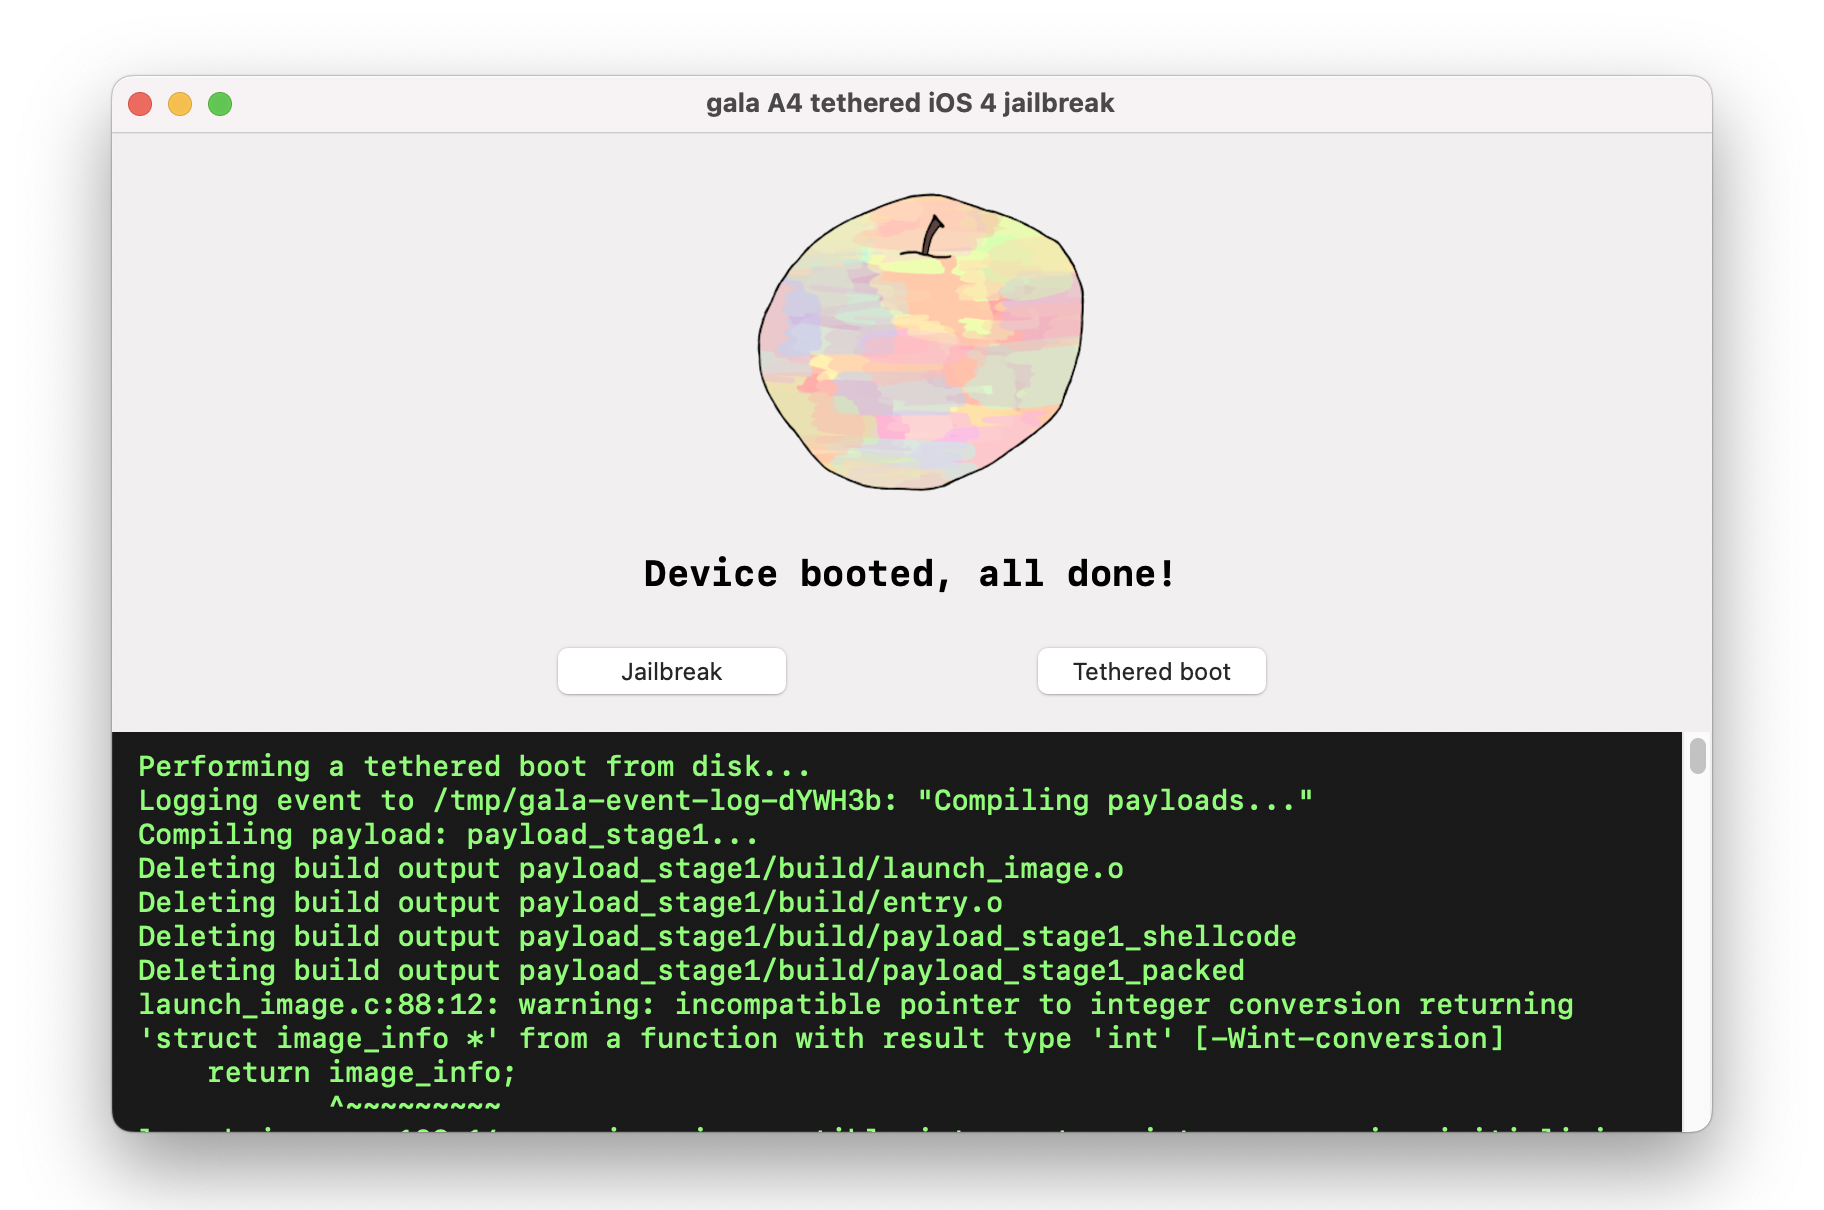
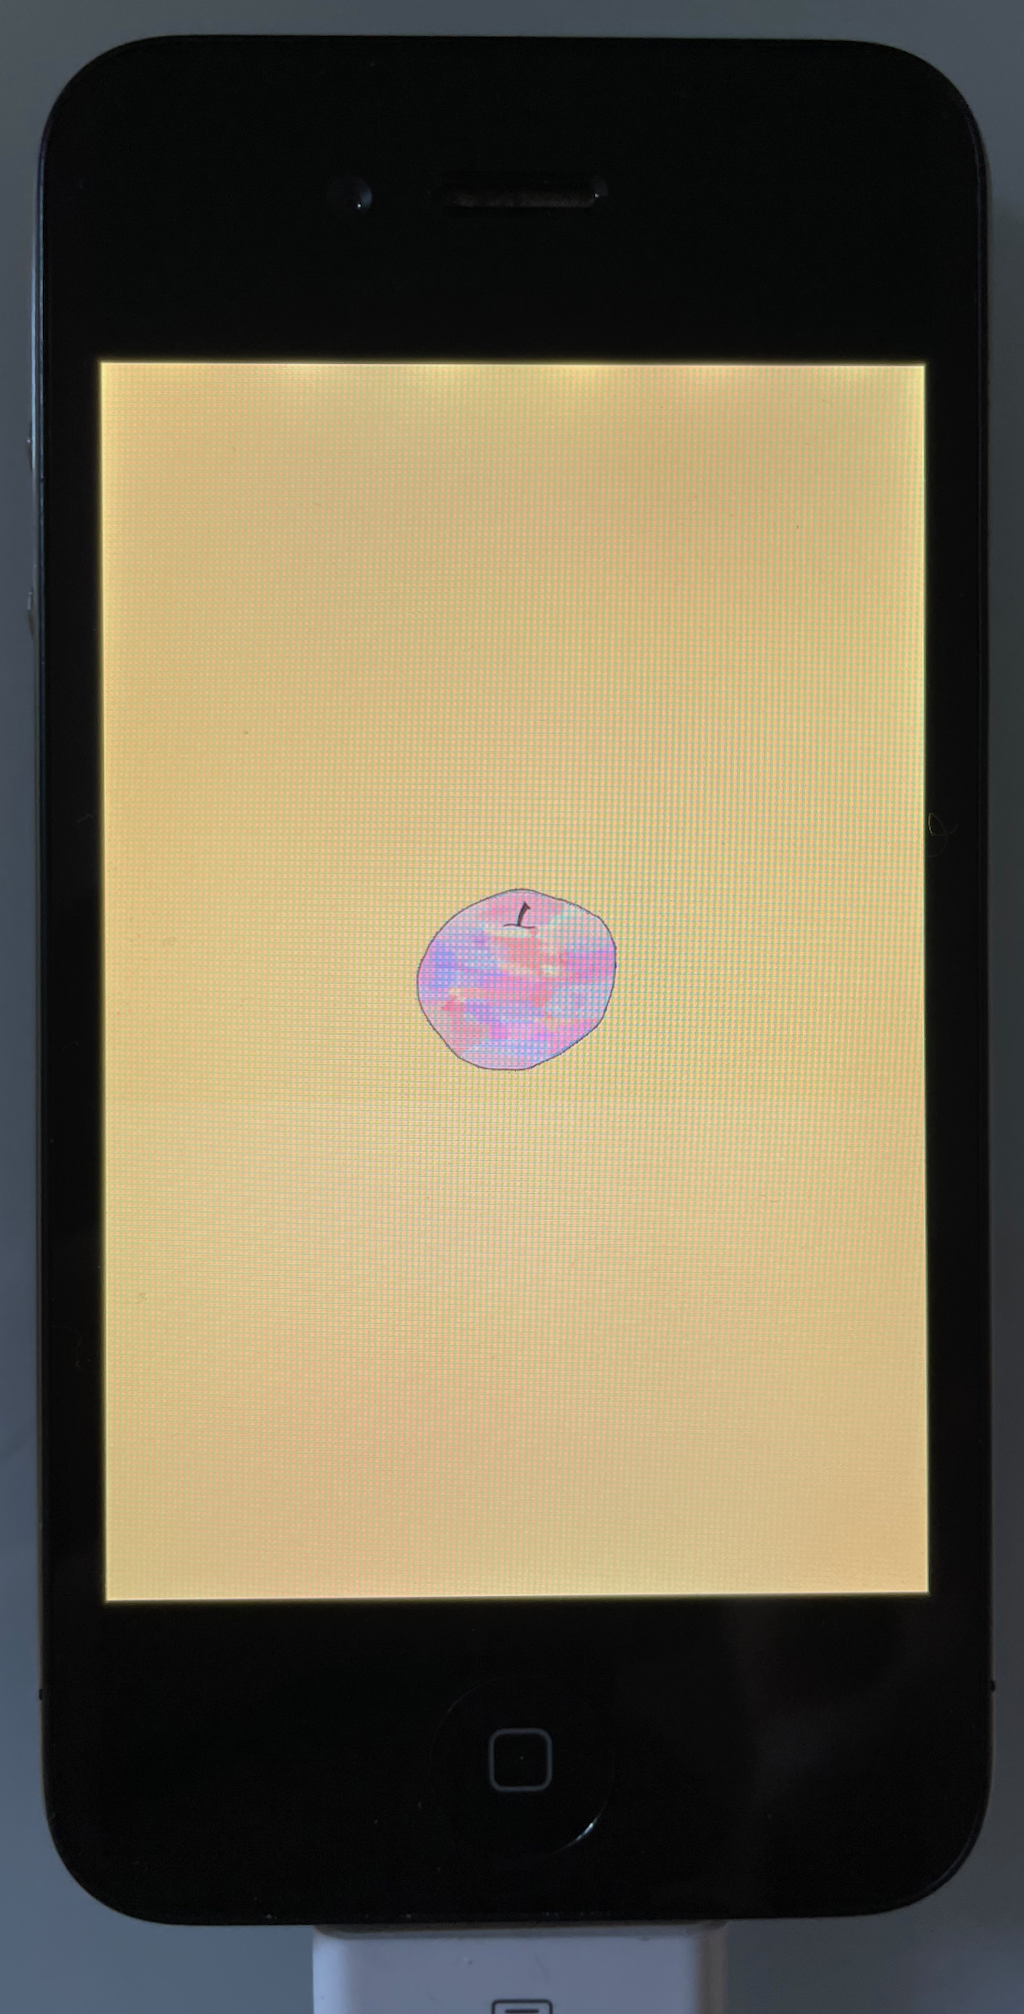
Eventually, to my overflowing satisfaction:
$
Here are the photos from the first time I managed to get a custom logo to render. I was really thrilled!
|
|
|
|
|---|
Lastly, here’s the PatchSet I came up with to facilitate this.
iPhone3_1_4_0_8A293_patches/ibec.py
    PatchSet(
        name="Custom boot logo",
        patches=[
            # Check SDOM
            InstructionPatch.quick(0x5FF0DADC, Instr.thumb("movs r1, #0")),
            InstructionPatch(
                function_name="image3_load_decrypt_payload",
                reason="""
                    These instructions branch to a routine to verify the CHIP tag on the image.
                    We don't want this comparison anyway, and here I'm overwriting the registers to match their
                    states when loading a successful image.
                """,
                address=VirtualMemoryPointer(0x5FF0DB46),
                orig_instructions=[
                    Instr.thumb("mov r0, r5"),
                    Instr.thumb("bl #0x5ff0d7c0"),
                ],
                patched_instructions=[
                    Instr.thumb("movs r0, #0"),
                    Instr.thumb("mov r1, r2"),
                    Instr.thumb("movs r2, #1"),
                ],
                expected_length=6,
            ),
            InstructionPatch(
                function_name="image3_load_validate_constraints",
                reason="""
                    After the call to validate_shsh_and_cert just above, r0 == 0 indicates success. If successful,
                    we branch away. We always want to take the success branch.
                """,
                address=VirtualMemoryPointer(0x5FF0DA84),
                orig_instructions=[Instr.thumb("beq.w #0x5ff0ddd4")],
                patched_instructions=[Instr.thumb("b #0x5ff0ddd4"), Instr.thumb_nop()],
                expected_length=4,
            ),
            InstructionPatch(
                function_name="image3_load_decrypt_payload",
                reason="""
                    The original instruction here compares r3 to 0. This comparison needs to succeed, but doesn't
                    for images we generate. Override the comparison so we can move forward.
                """,
                address=VirtualMemoryPointer(0x5FF0DC92),
                orig_instructions=[Instr.thumb("cmp r3, #0")],
                patched_instructions=[Instr.thumb("cmp r3, r3")],
            ),
        ],
    )
All done, let’s move into the iBEC execution environment!
Patching the iBEC
As it turns out, the structure of the iBSS and iBEC are very similar. All it takes to convince the iBEC to load images with an invalid signature, and to set custom pictures with an invalid signature, is to find the same pieces of code that we patched in the iBSS and apply the same patches. The only real difference is in the iBEC’s load address: whereas the iBSS is based at 0x84000000, the iBEC is loaded to 0x5ff00000.
This was mostly an exercise in re-analyzing the same code in another binary, finding the same code locations compiled under slightly different conditions.
Let’s send our compromised iBEC to the iBSS, then set a custom boot logo in the same way we do for the iBSS.
iPhone3_1_4_0_8A293_patches/ibss.py
# The SecureROM payload will load and jump to the iBSS,
# which will present as a Recovery Mode device.
with acquire_device(DeviceMode.Recovery) as recovery_device:
    # Upload and set the boot logo
    recovery_device.upload_file(image_types_to_paths[ImageType.AppleLogo])
    recovery_device.send_command("setpicture")
    # `setpicture` doesn't cause a display refresh, we need `bgcolor` to do the work
    recovery_device.send_command("bgcolor 0 0 0")

    # Upload and jump to the iBEC
    recovery_device.upload_file(image_types_to_paths[ImageType.iBEC])

    try:
        recovery_device.send_command("go")
    except usb.core.USBError:
        # The device may drop the connection when jumping to the iBEC,
        # but it's no problem. We'll reconnect just below.
        pass

# Give the iBEC a moment to come up cleanly
with acquire_device_with_timeout(DeviceMode.Recovery) as recovery_device:
    print(f'Device is now running iBEC: {recovery_device}')
    # Set the boot logo again
    recovery_device.upload_file(image_types_to_paths[ImageType.AppleLogo])
    recovery_device.send_command("setpicture")
    recovery_device.send_command("bgcolor 0 0 0")
$
Now that we’re running a patched iBEC, we’ve got all the pieces in place for the next step of the boot process: loading the kernel.
Loading the kernel
Like we saw earlier, the iBSS and iBEC are normally only run as part of the ‘Restore iPhone’ procedure. As the next step of this process, the host computer performing the restore will now send over some resources that the device needs to boot further, rather than expecting the device to provide it from its own on-disk filesystem. In particular, these resources are:
- The kernel
- A ramdisk containing a filesystem
- A ‘device tree’ describing the state of the connected hardware
It’s straightforward to send all three to the device by following the same pattern as before, then informing the device about each image via some commands that are specific to the iBEC.
iPhone3_1_4_0_8A293_patches/ibec.py
with acquire_device_with_timeout(DeviceMode.Recovery) as recovery_device:
    # Upload the device tree, ramdisk, and kernelcache
    recovery_device.upload_file(image_types_to_paths[ImageType.DeviceTree])
    recovery_device.send_command("devicetree")

    recovery_device.upload_file(image_types_to_paths[ImageType.RestoreRamdisk])
    recovery_device.send_command("ramdisk")

    recovery_device.upload_file(image_types_to_paths[ImageType.KernelCache])
    try:
        recovery_device.send_command("bootx")
    except usb.core.USBError:
        # The device may drop the connection when jumping to the kernel, but it's no problem
        pass
Let’s try it out.
$
Wow! We’ve got a Recovery screen! The device is now expecting the host to send a fresh OS installation over USB, which it’ll then flash to NAND.

This is the first point where I really got the sense that what was happening on the device was bigger than I could fully control. There are device drivers, daemons, a filesystem, a Mach-O loader, Objective-C support, dynamic libraries, CoreFoundation.framework, crash reporting, all under the purview of a live kernel. We’ve got a serious, and compromised, system running away from us.
Unfortunately, the first time I managed to boot this far, I ended up accidentally wiping the device’s NAND. This means that the device won’t be able to boot to iOS until I manage to get a restore to complete successfully. At the very least, this provides some fun motivation to get things working! Read more in Part 4: Investigating the Ramdisk.