Exploiting the iPhone 4, Part 2: Bypassing the Boot Chain
Reading time: 5 minutes
gala
This series follows along as I build gala, an iOS 4 jailbreak for the iPhone 4.
- Part 1: Gaining Entry
- Part 2: Bypassing the Boot Chain
- Part 3: Patching the Boot Chain
- Part 4: Investigating the Ramdisk
- Part 5: Flashing the Filesystem
- Part 6: Post-boot Paradise
|
|
|
|---|
On with the show...
How do you boot iOS? … Carefully
Now that we’ve gained confident control of the SecureROM environment, let’s move on to something more ambitious: booting iOS.
Of course, running unsigned code in DFU mode, then handing the reigns back to a secure boot chain kind of defeats the purpose of running unsigned code in the first place. What would be great is if we could boot iOS, but in a special way that disables all the security mechanisms present after the SecureROM. This is jailbreaking! Recall our chain of trust from earlier:

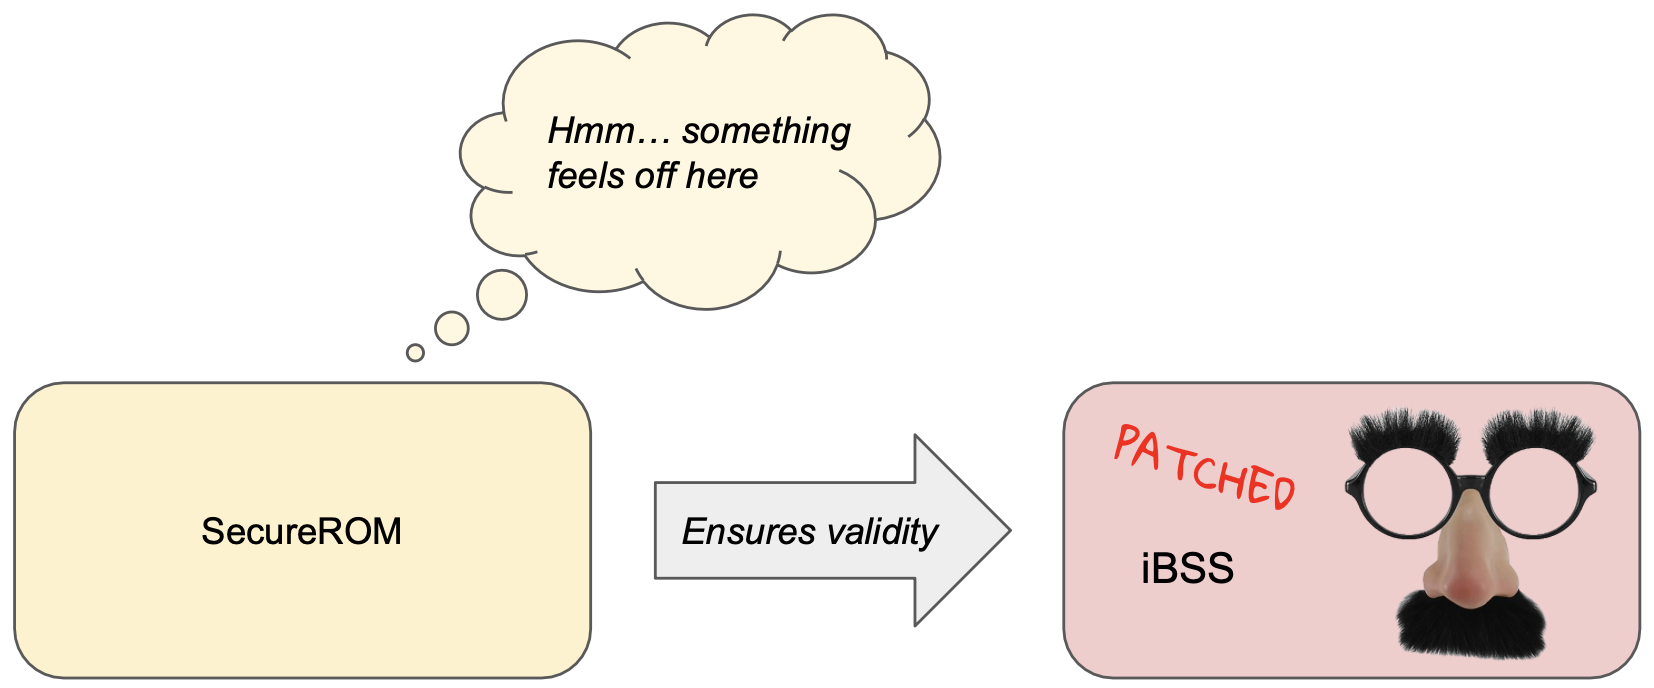
It’s not enough to just run some unsigned code in SecureROM and call it a day. Now that we’re able to compromise the SecureROM, we’ll use it to load and run a compromised iBSS. We’ll modify our iBSS to disable its security checks. This modification would normally invalidate its code signature, and therefore the SecureROM would refuse to execute it, but that’s what we’re here for. Similarly, we’ll then ask our compromised iBSS to execute a compromised iBEC, which again has its signature validity checks patched out, and so on and so on until we’ve booted a full iOS system with all the security mechanisms disabled, and with whatever custom behavior we decide to add baked in.
Baby steps
OK, let’s boot an iBSS!
First, I downloaded an iOS 4 IPSW and unzipped it. In this case, the iBSS is available at /Firmware/dfu/iBSS.n90ap.RELEASE.dfu.
Now, we’ll need to get the iBSS over to the device. As we saw earlier, the iBSS is normally run when restoring an iPhone over USB. The iBSS image is sent to the device in the exact same way that we sent data to the device when running our limera1n exploit: by using the 0x21:2 USB control message. This makes sense, because limera1n is exploiting a vulnerability in this very procedure of sending and processing an image!
jailbreak.py
    # (We've just run our exploit above)
    # Give the device a moment to await an image again
    with acquire_device_with_timeout(DeviceMode.DFU, timeout=3) as dfu_device:
        print(f'Sending {image_path.name} to DFU device...')
        dfu_device.upload_file(image_path)
Once we’ve sent over the full iBSS data, we need to inform the device that the file upload has finished. The SecureROM will understand that it’s time to process, validate, and potentially load and execute the image if everything looks okay.
We inform the device that the upload has finished by sending the Get Status control message (0xA1:3) three times, then sending a device reset. My understanding is that detecting this particular sequence is encoded in the USB handling in the SecureROM.
Let’s give it a try!
$
Ah, it crashed. That’s not ideal, but we can work with it!
The fact things didn’t “just work” actually makes a fair bit of sense: normally in DFU mode, the SecureROM is running some processing code that’s waiting for a USB image, and is ready to kick off some work once it’s fully uploaded. We, with our injected shellcode and memory dump hullabaloo, have trampled over all of that functionality. Before we can successfully upload an iBSS, we need the SecureROM to be expecting the image.
One way to do this is to reuse what’s already in the SecureROM. We’ve injected our code to do our memory dump, but there’s no reason we can’t now hand the reins back to a sensible SecureROM code path, which knows how to do all the intricacies around receiving and loading an image. Let’s modify our payload to jump back to an appropriate place in the SecureROM code once we’re finished running our code.
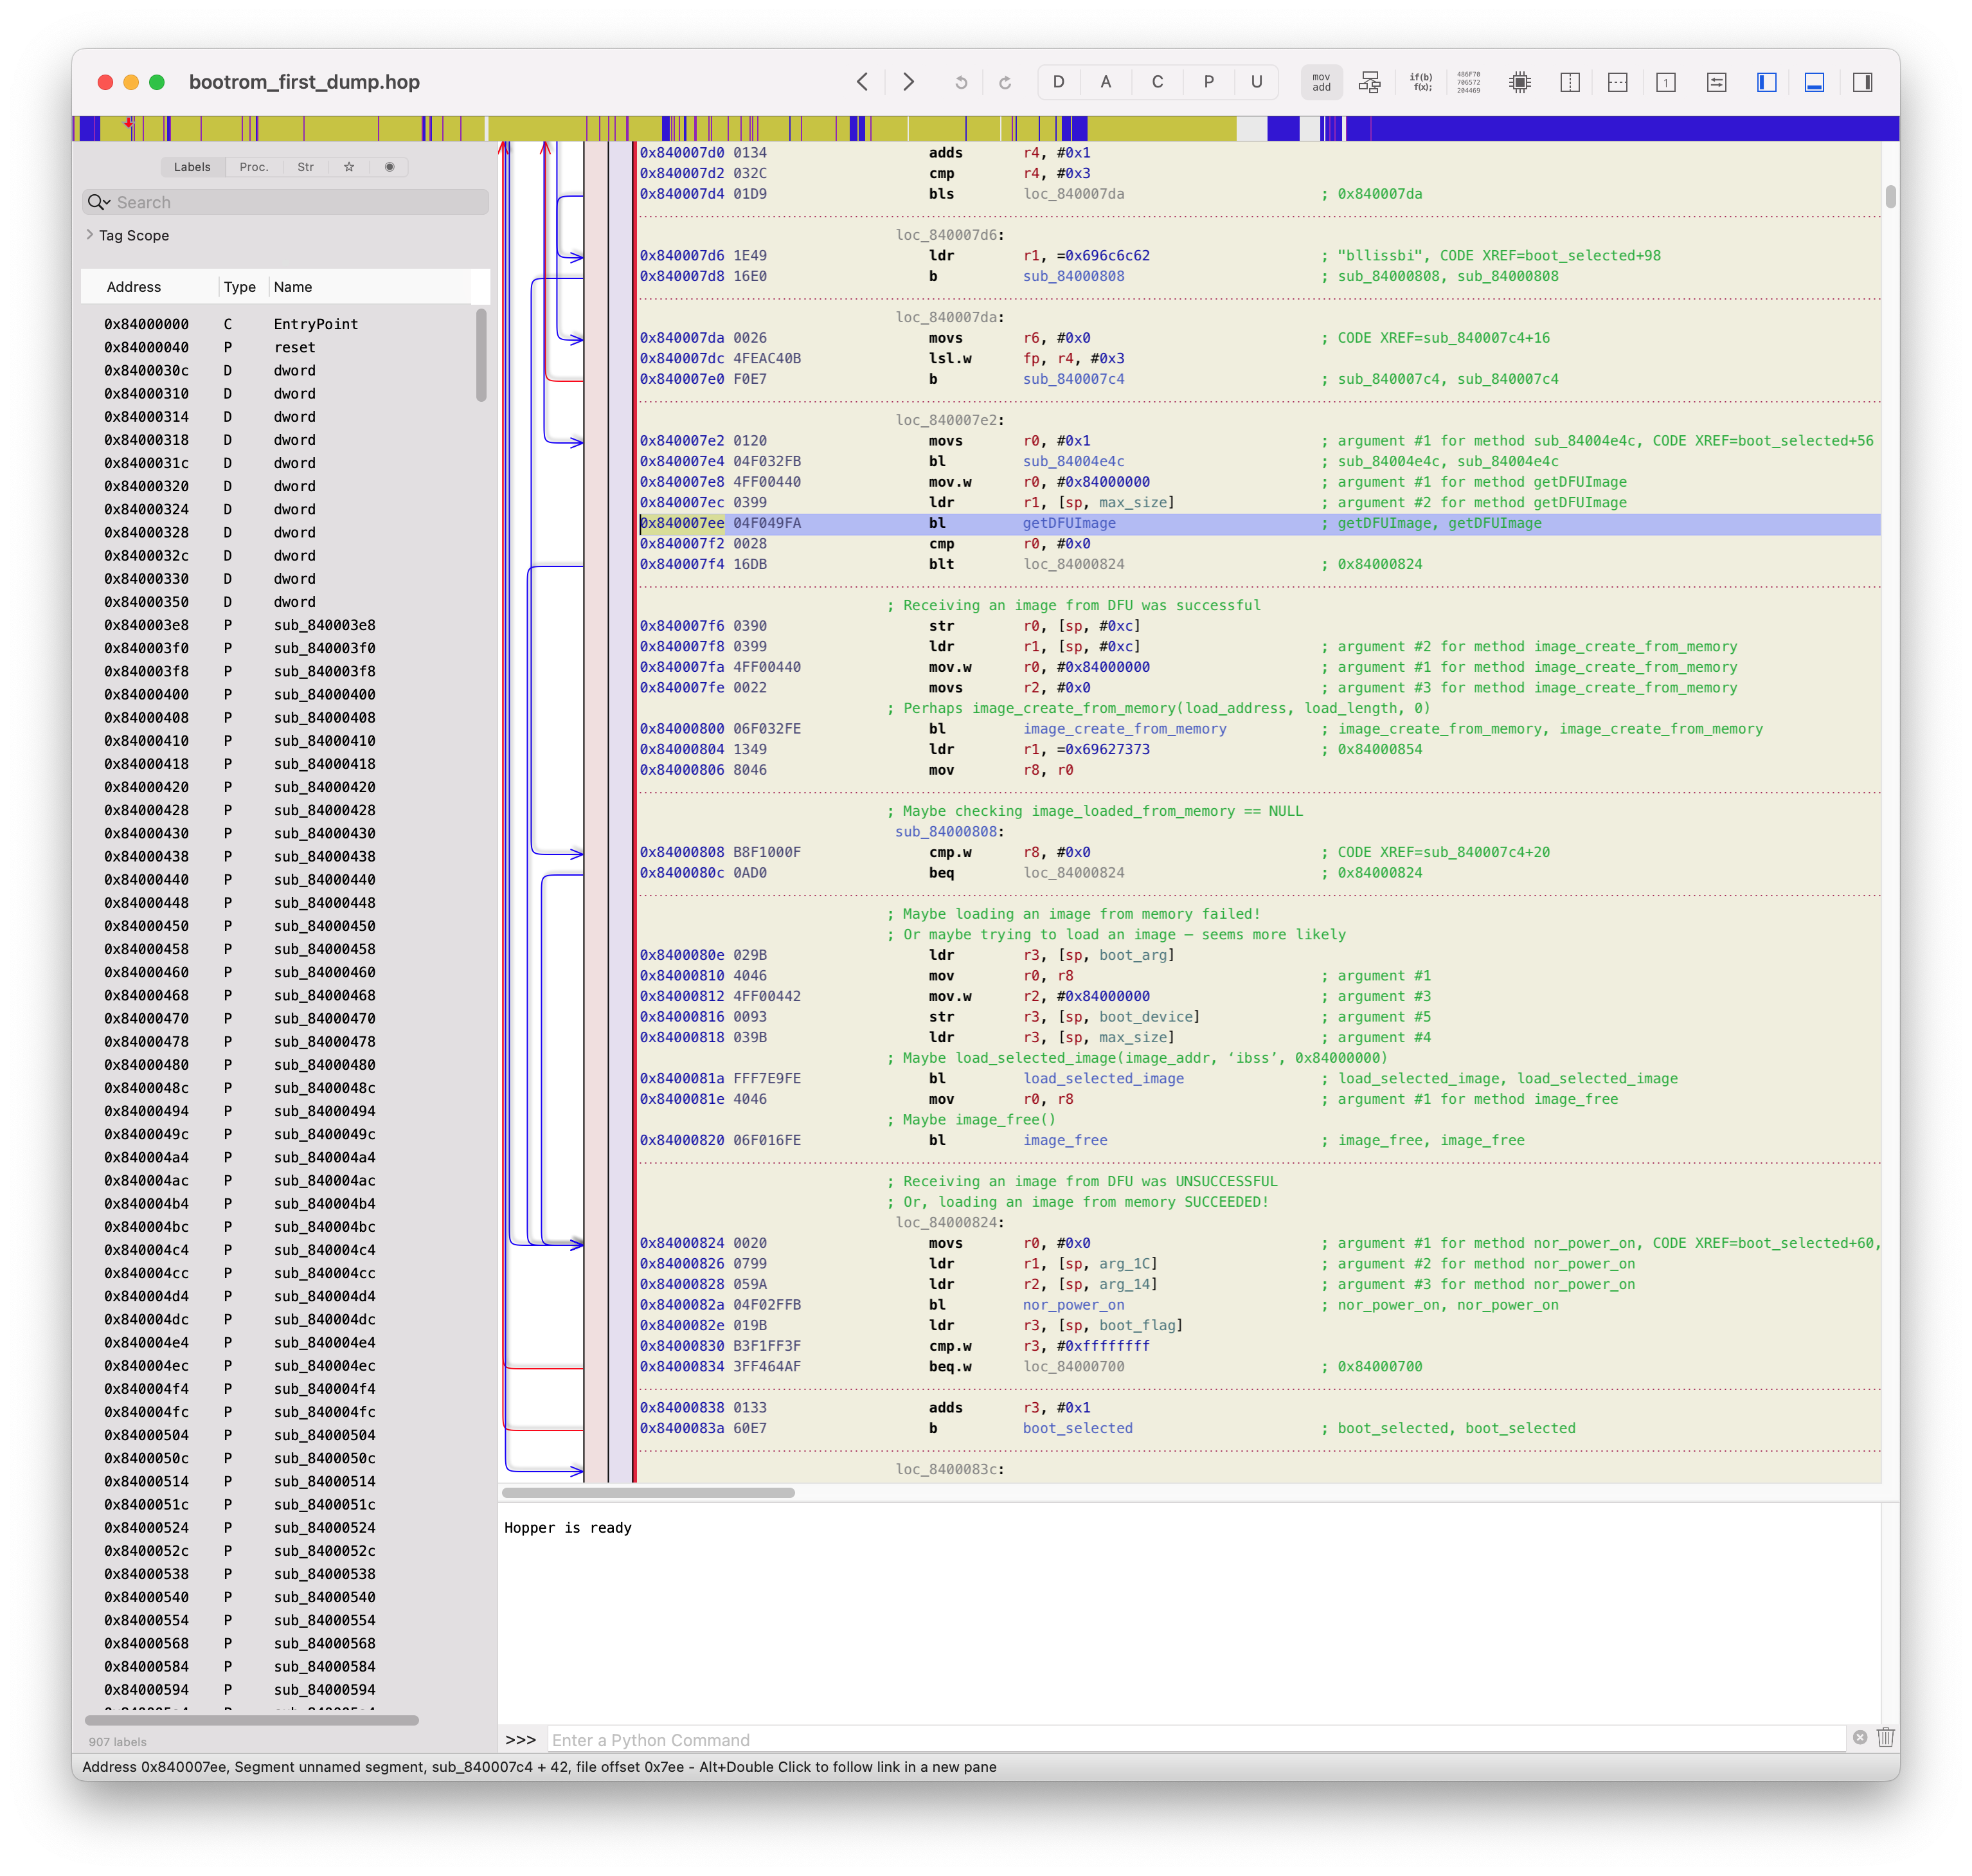
Once we’ve finished running our payload, let’s jump back to this point in the SecureROM’s normal runloop. This code will invoke SecureROM functions that wait for an image to be uploaded over USB, then will attempt to validate the image and decide whether to allow it to run.
With that, we can rebuild our runner and watch what happens!
$
Awesome! The iBSS has been successfully loaded and executed by the SecureROM.
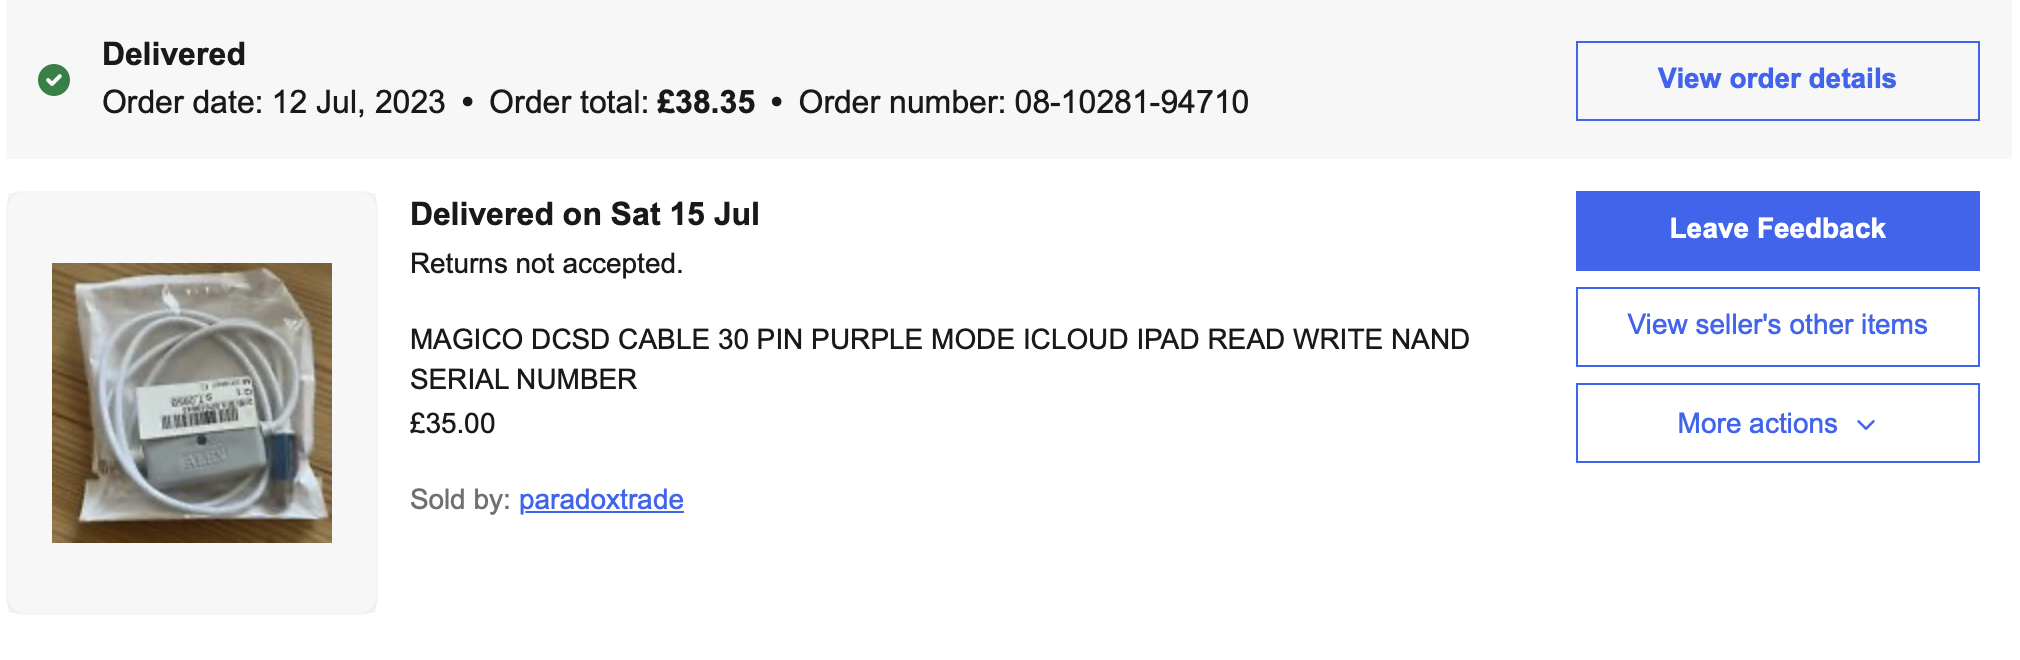
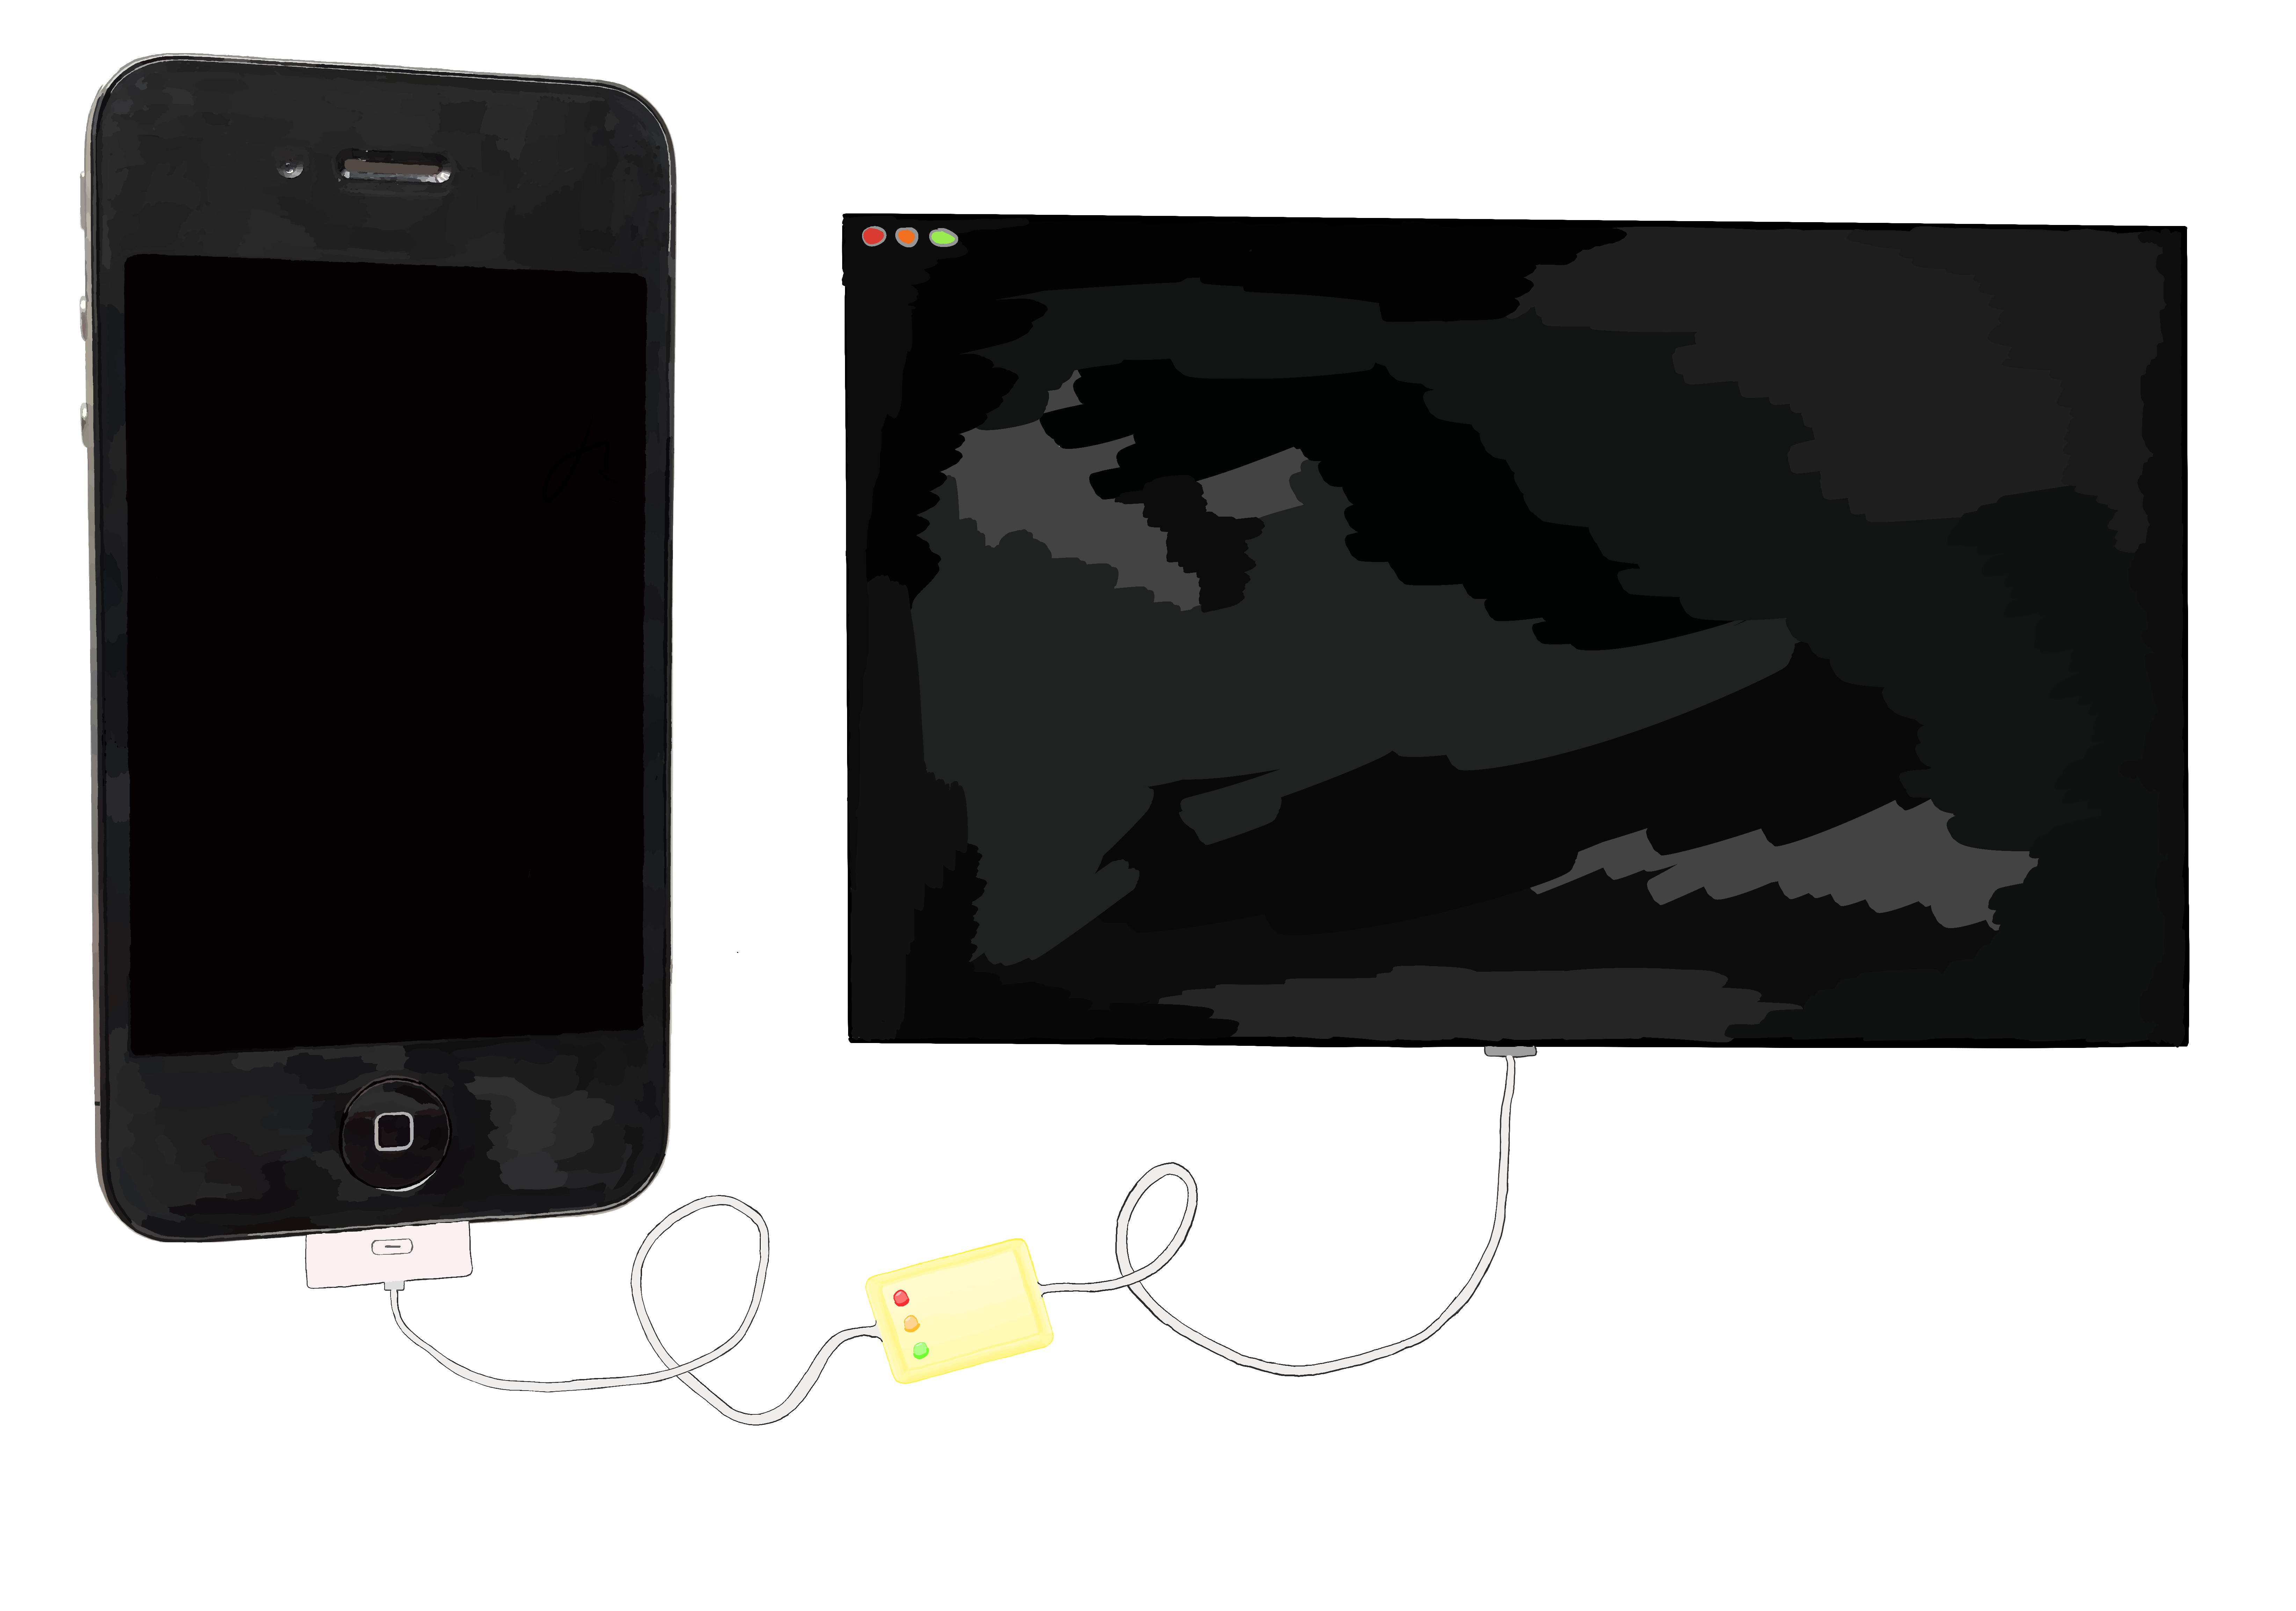
This was about the time when debugging everything via memory dumps that I’d pull over USB got old. This technique is only useful when I have full control of the system, and doesn’t give me much recourse in the event of a crash. Once I jump back into SecureROM-owned code, I have no more control or visibility into the system, and it can be really tough to crack what’s going wrong. I knew that the system natively outputs logs over UART. These logs would be immensely helpful for understanding what’s happening, but you need specialized hardware in order to read these logs. I snagged a DCSD cable off eBay.
Lo and behold, I could read the iBSS logs!


$


Wow. That’s cool.
Loading a modified iBSS
Since our end goal is running unsigned code, we don’t have much use for the iBSS as is. An out-of-the-box iBSS will enforce all of its signature validity checks, and will refuse to run any code that we’ve compromised (or otherwise modified in any way at all!). Therefore, we’ll want to modify the iBSS that we load by applying some well-chosen patches that neuter its security validations.
Our patches that disable the iBSS functionality which checks code signatures will also invalidate the code signature of the iBSS itself!
It’d be quite convenient if we could patch out the validation checks from the SecureROM in the same way that we patch them out of the iBSS and (eventually) the iBEC and kernel. Unfortunately, the SecureROM is special: it’s stored in read-only memory, which is a bit of a double-edged sword. Just like Apple can’t fix any vulnerabilities in devices with a given SecureROM version, so too are we unable to replace our SecureROM with a patched version that doesn’t include the signature validation checks.
Okay, we can’t change the image validation code in the SecureROM. Could we skip it instead?
As it turns out, yes! We can update our payload to include a custom version of the SecureROM image loading logic, but skip the part where the SecureROM would normally call its image validation logic. This gets around the image validation, but imposes a fair bit of work for us: we need to recreate the code path that loads the image and run all the right code to take the raw binary file sent over USB and prepare the system for its execution✱. I’m indebted to axi0mx’s work that showed me the way here.
✱ Note
0x0, but it’s a fun thought nonetheless.Let’s make an arbitrary patch to the iBSS to invalidate its code signature, and try loading it again. If our exploit payload is doing its job, the iBSS will be executed despite its invalid code signature.
After decrypting the iBSS with the correct keys, I load it into a hex editor and make a small, but recognizable tweak to the welcome message: changing iBoot in the vanity startup message to iRoot =).
$
Now we’re cooking with hot sauce. Read more in Part 3: Patching the Bootchain.