Exploiting the iPhone 4, Part 1: Gaining Entry
Reading time: 15 minutes
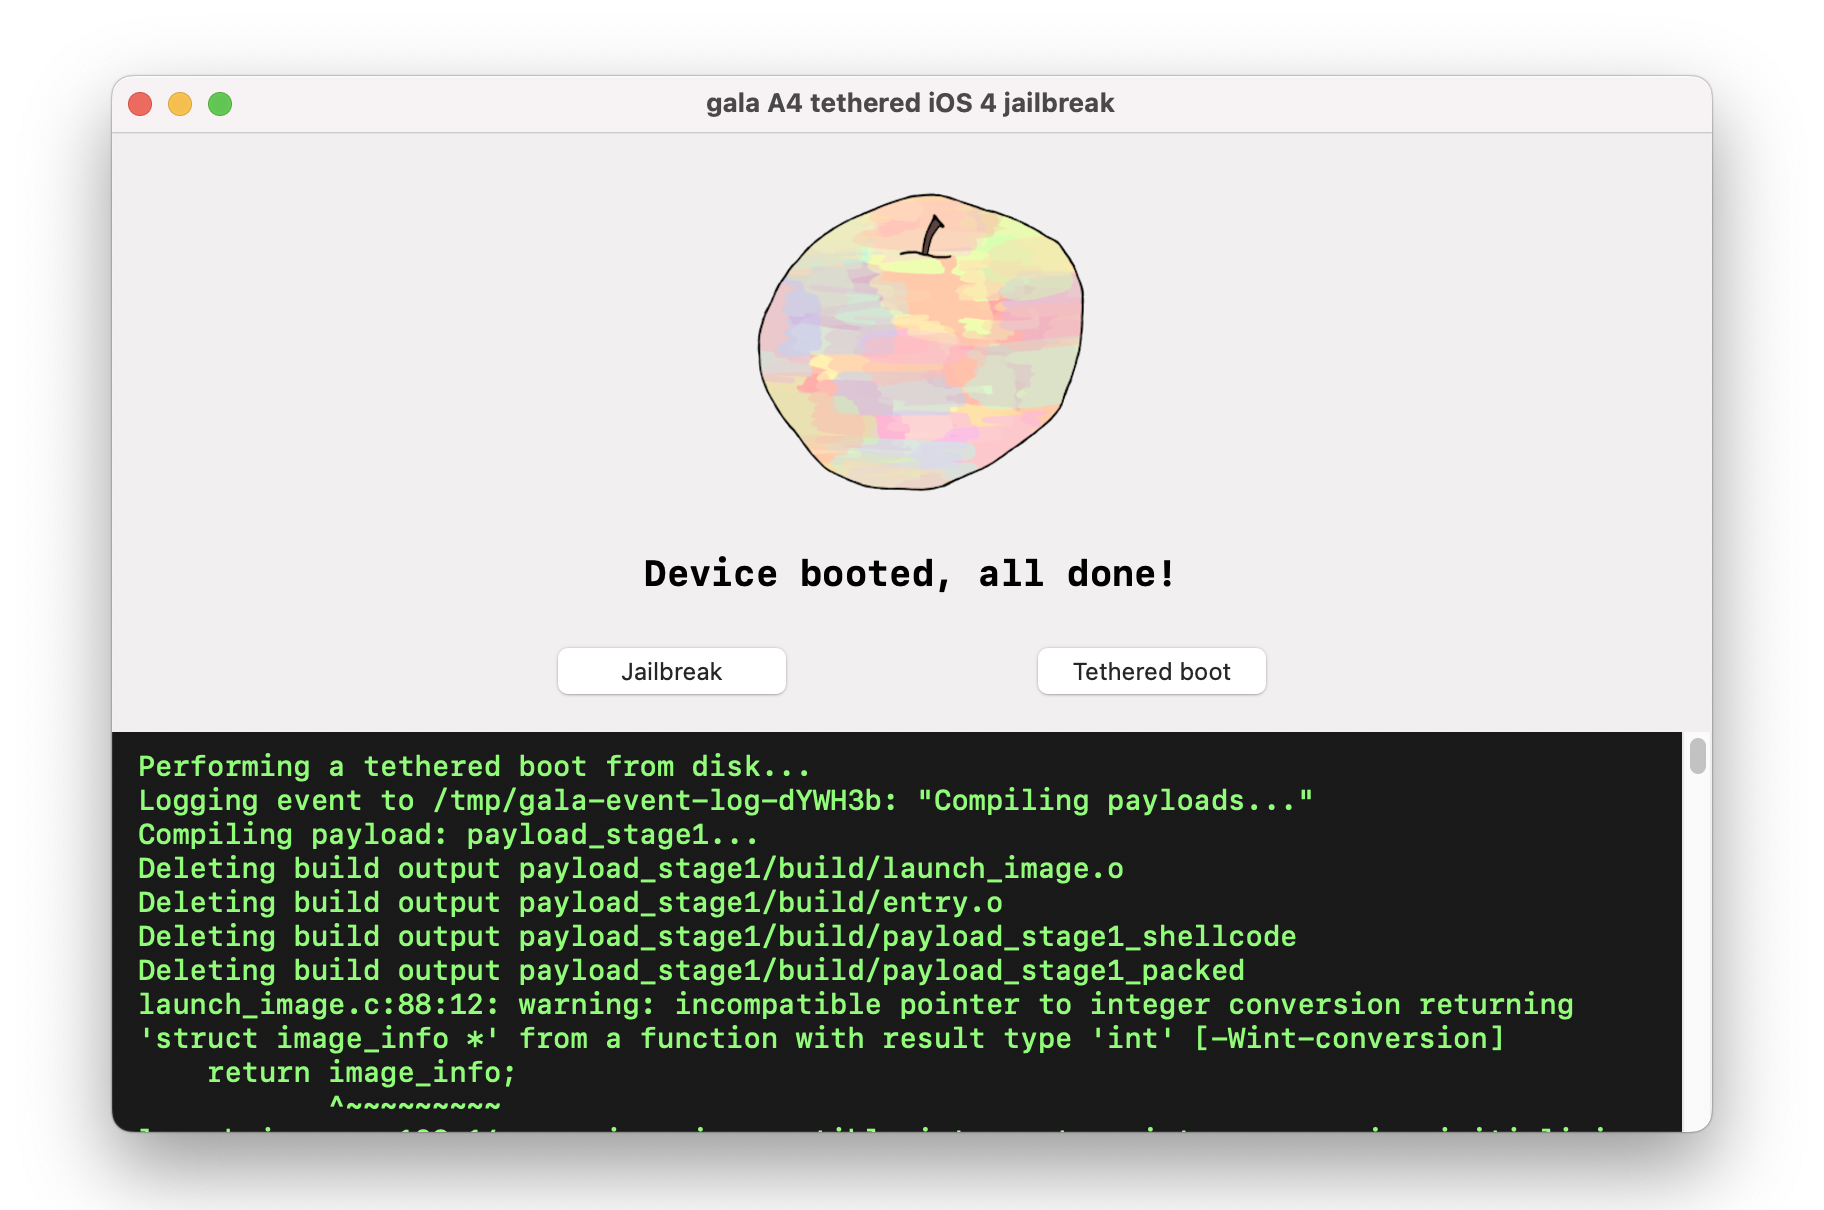
gala
This series follows along as I build gala, an iOS 4 jailbreak for the iPhone 4.
- Part 1: Gaining Entry
- Part 2: Bypassing the Boot Chain
- Part 3: Patching the Boot Chain
- Part 4: Investigating the Ramdisk
- Part 5: Flashing the Filesystem
- Part 6: Post-boot Paradise
|
|
|
|---|
On with the show...
Table of contents
✱ Note
Introduction
Years ago, I was active in the iOS tweak development scene. I made many products and tools, distributed on Cydia, that modified iOS system behavior and added new functionality to SpringBoard. This was a really fun time, and gave me valuable early career exposure to reverse engineering closed-source binaries, interacting directly with the Objective-C runtime, and entrepreneurship. I’m really grateful for those years.
|
Quick app interaction via 3D Touch |
Force Touch app launcher. Video from an iDownloadBlog review |
Passcode UI replacement. Video from an iDownloadBlog review |
|---|
One aspect of the jailbreak scene that always seemed like black magic to me, though, was the process of jailbreaking itself. The prospect is pretty remarkable: take any off-the-shelf iPhone, then enact obscene rituals and recite eldritch incantations until the shackles drop away. The OS will now allow you to run any code you point at it, irrespective of whether the code has gone through Apple’s blessed signing process, and paving the way for industrious tweak developers like myself.
A few weeks ago, I got a hankering to remove this shroud of mystery from jailbreaks by writing my own. One caveat: the really juicy work here has been done by my forebears. I’m particularly indebted to p0sixninja and axi0mx, who have graciously shared their knowledge via open source.
Port of entry
Step one. Acquire a device. I don’t know anything about writing a jailbreak or about what my approach will look like, so let’s just start somewhere obvious. I pick up an iPhone 4 and a 3GS off eBay. Older devices seem like a good place to start as their security is presumably worse, but you’ve got to find the sweet spot: really old devices are wildly valuable.
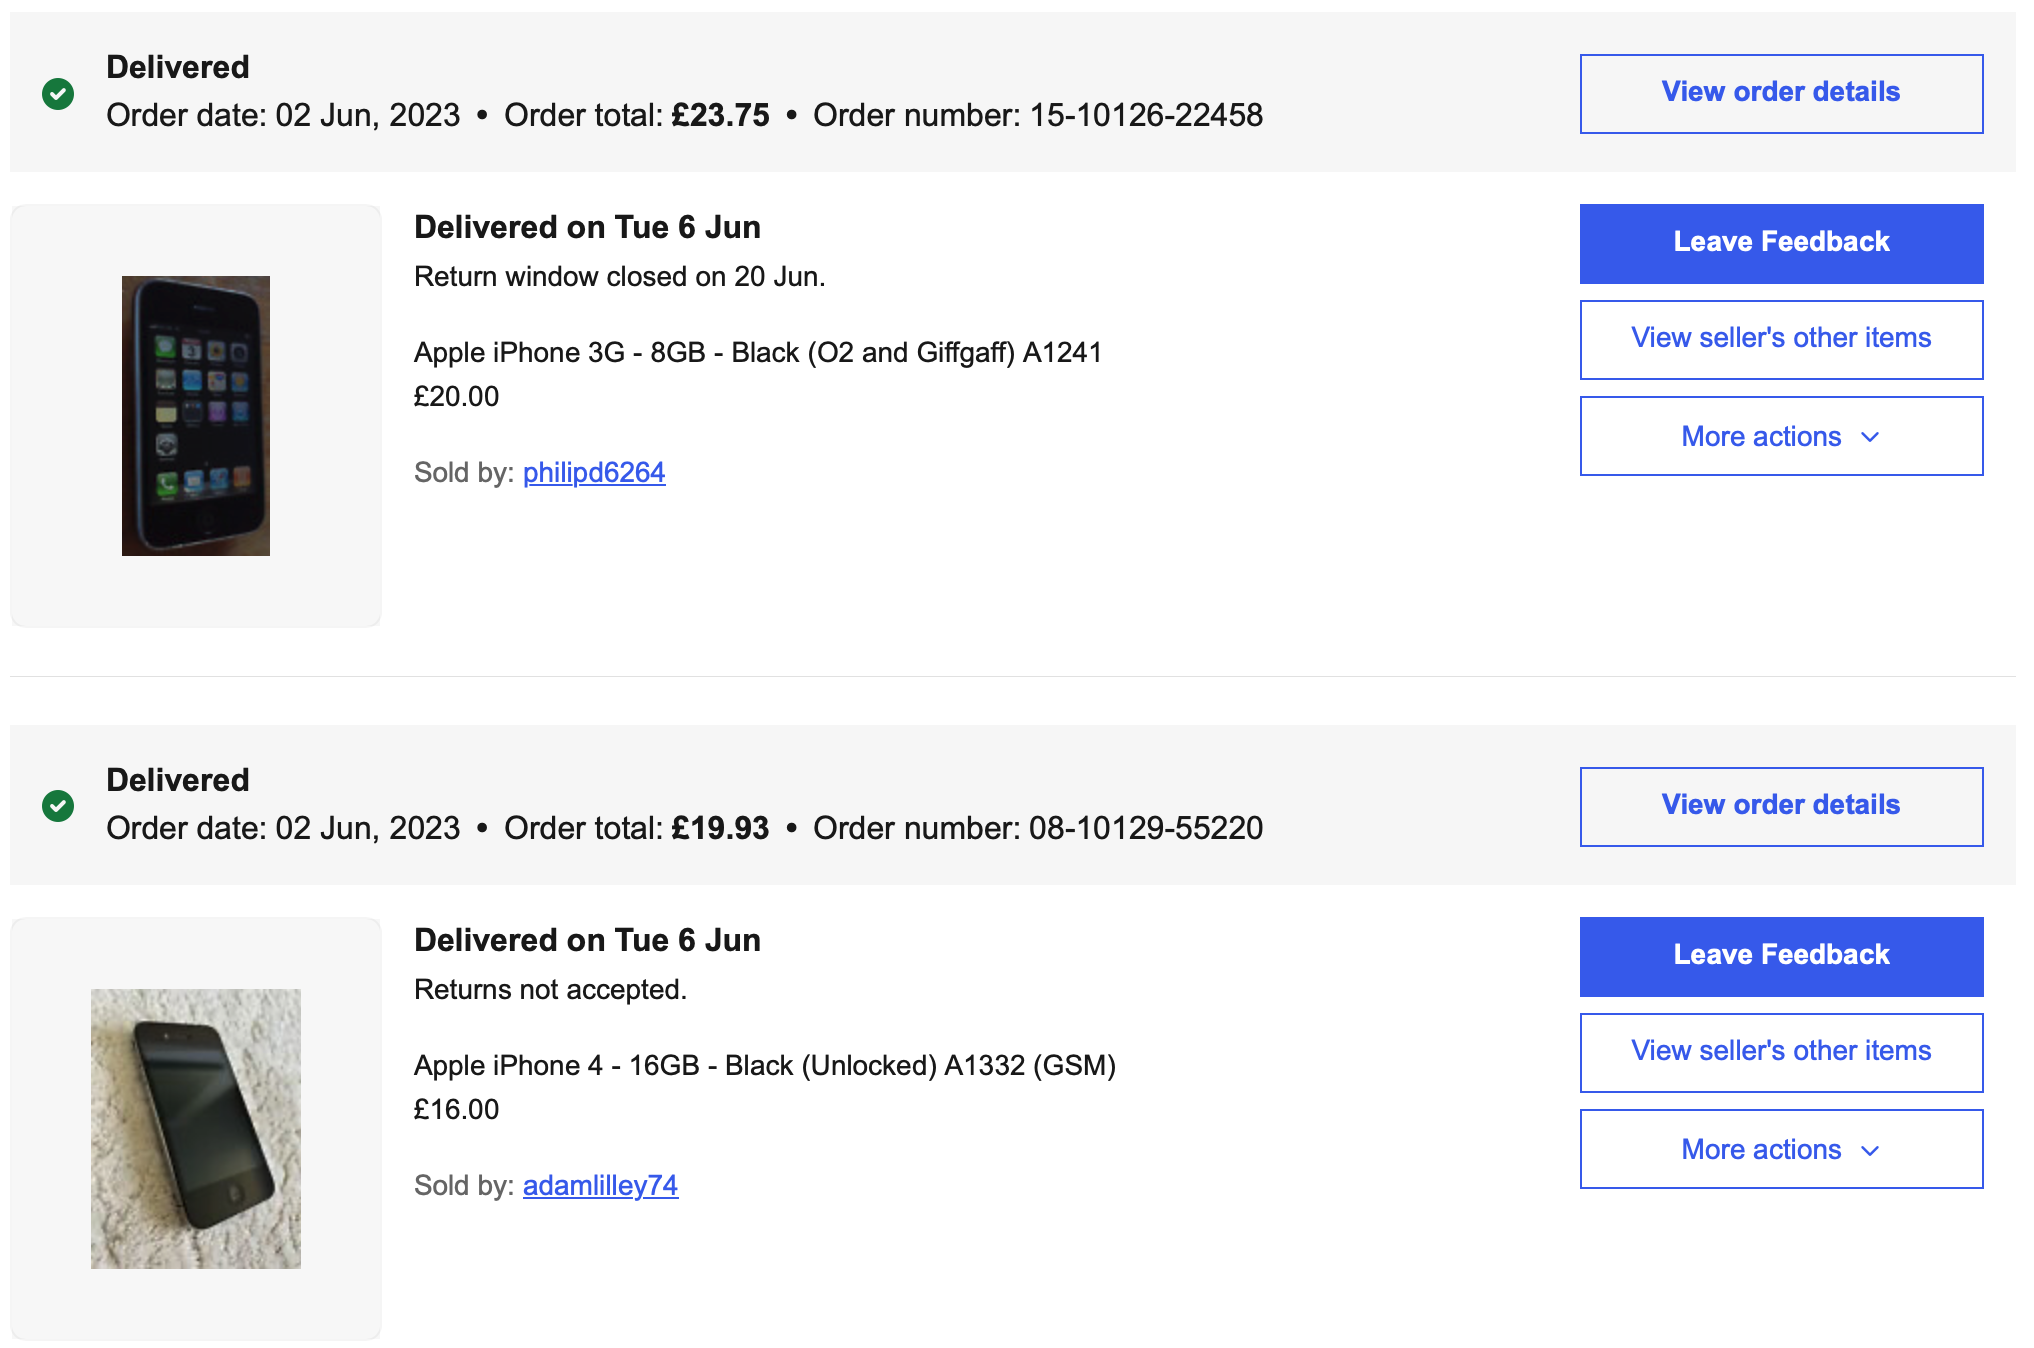
Now that I have two, why would I stop there? eBay pulls the flaps of its shadowy overcoat to reveal a torso lined with old iPhones, special offer of two for the price of three.

The devices arrive! I have vague notions about how one would exploit these, based on fragments I’ve read over the years: some buggy PDF parsing here, some vulnerable framebuffer code there. To try my hand at exploiting any of these, I’ll need to be able to run some code on the device. The imagined path here is that I manage to set up a toolchain that can produce and install applications the way it was done back in 2010. Using that, I would then write an app and poke around from within the sandbox to investigate the attack surface.
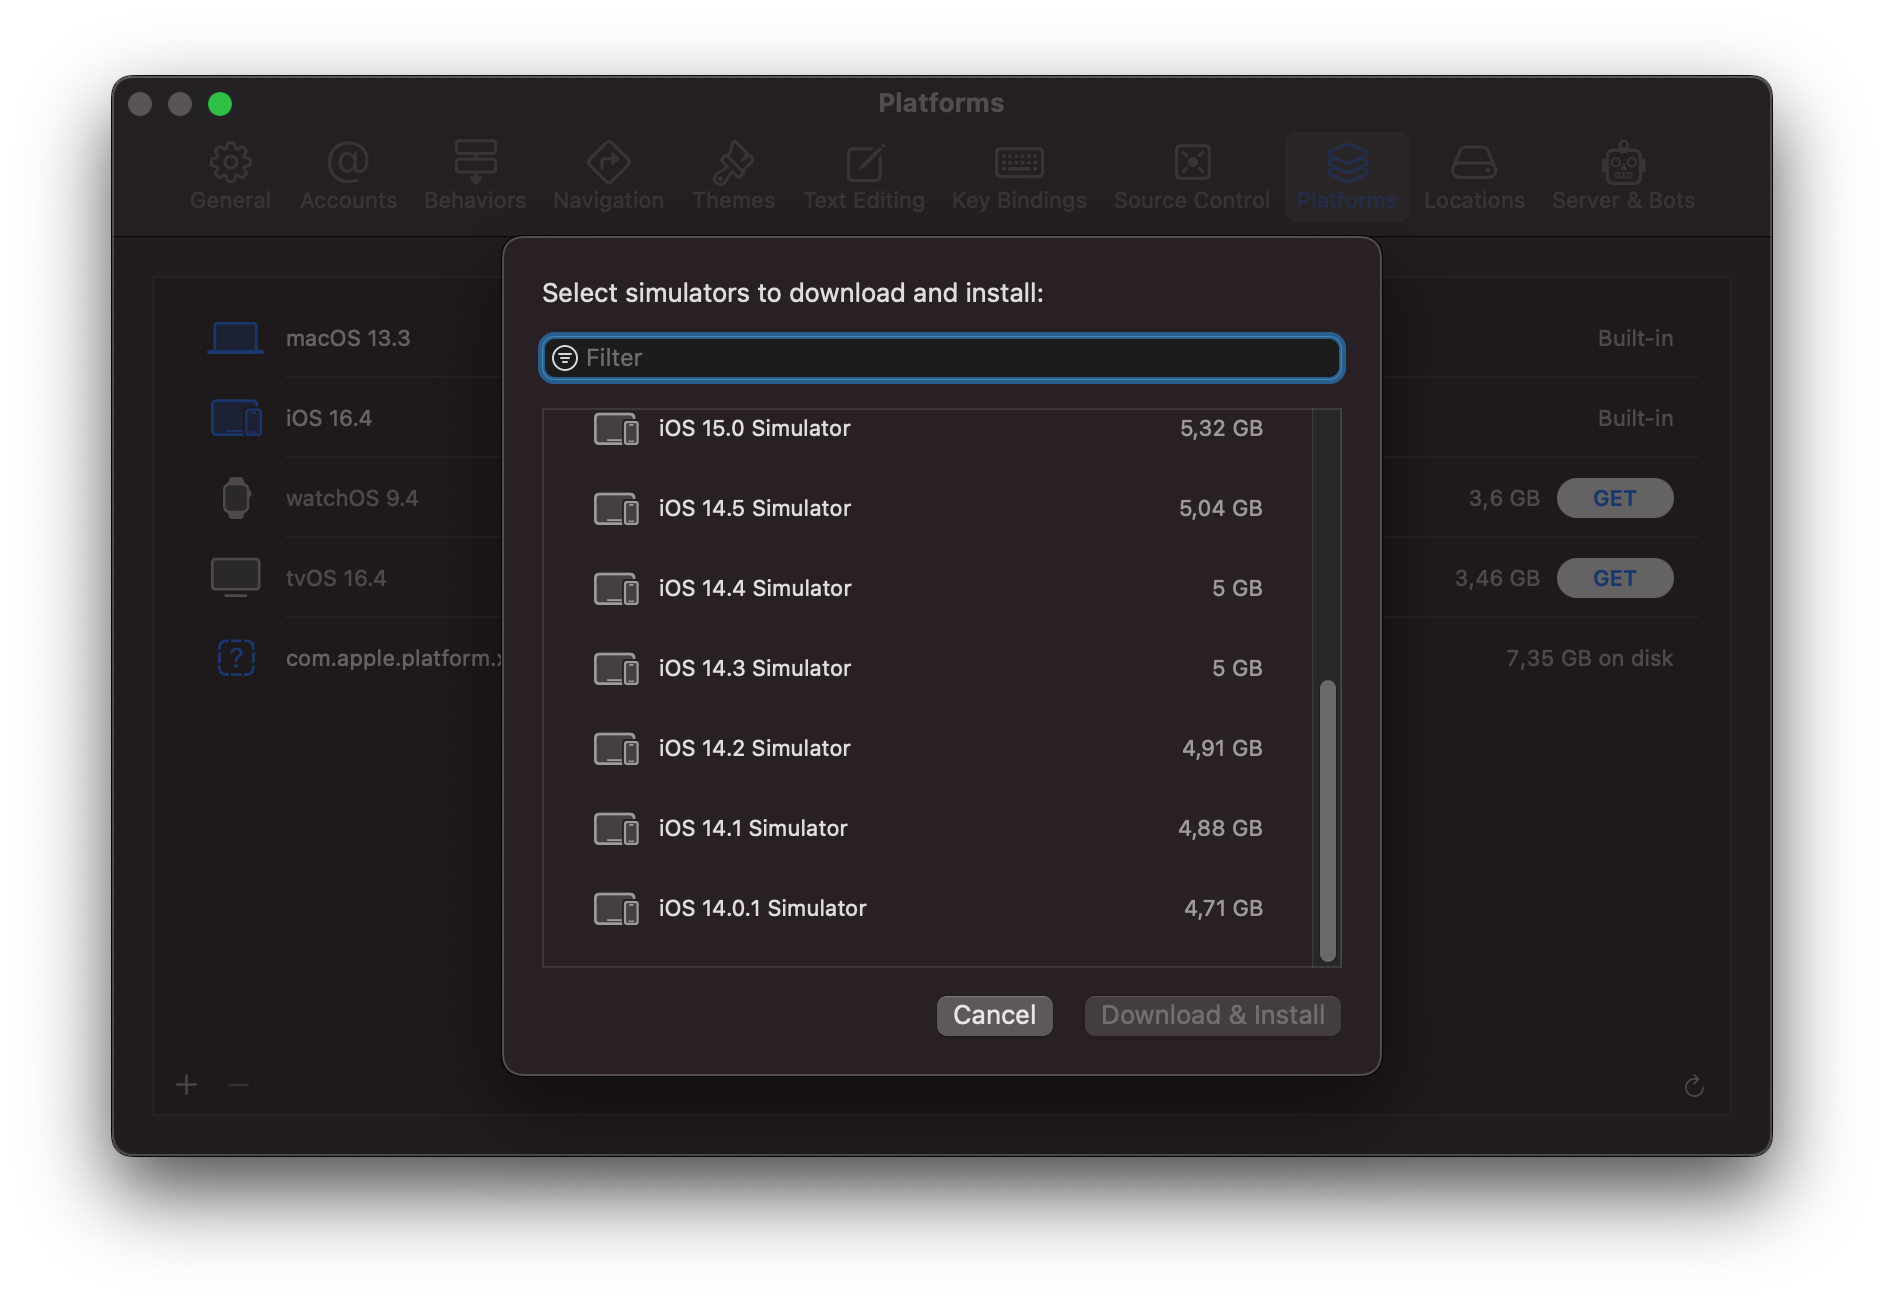
Hmm… it looks like recent versions of Xcode don’t allow targeting iOS versions more than a couple of years old. Maybe we can download an older Xcode version?
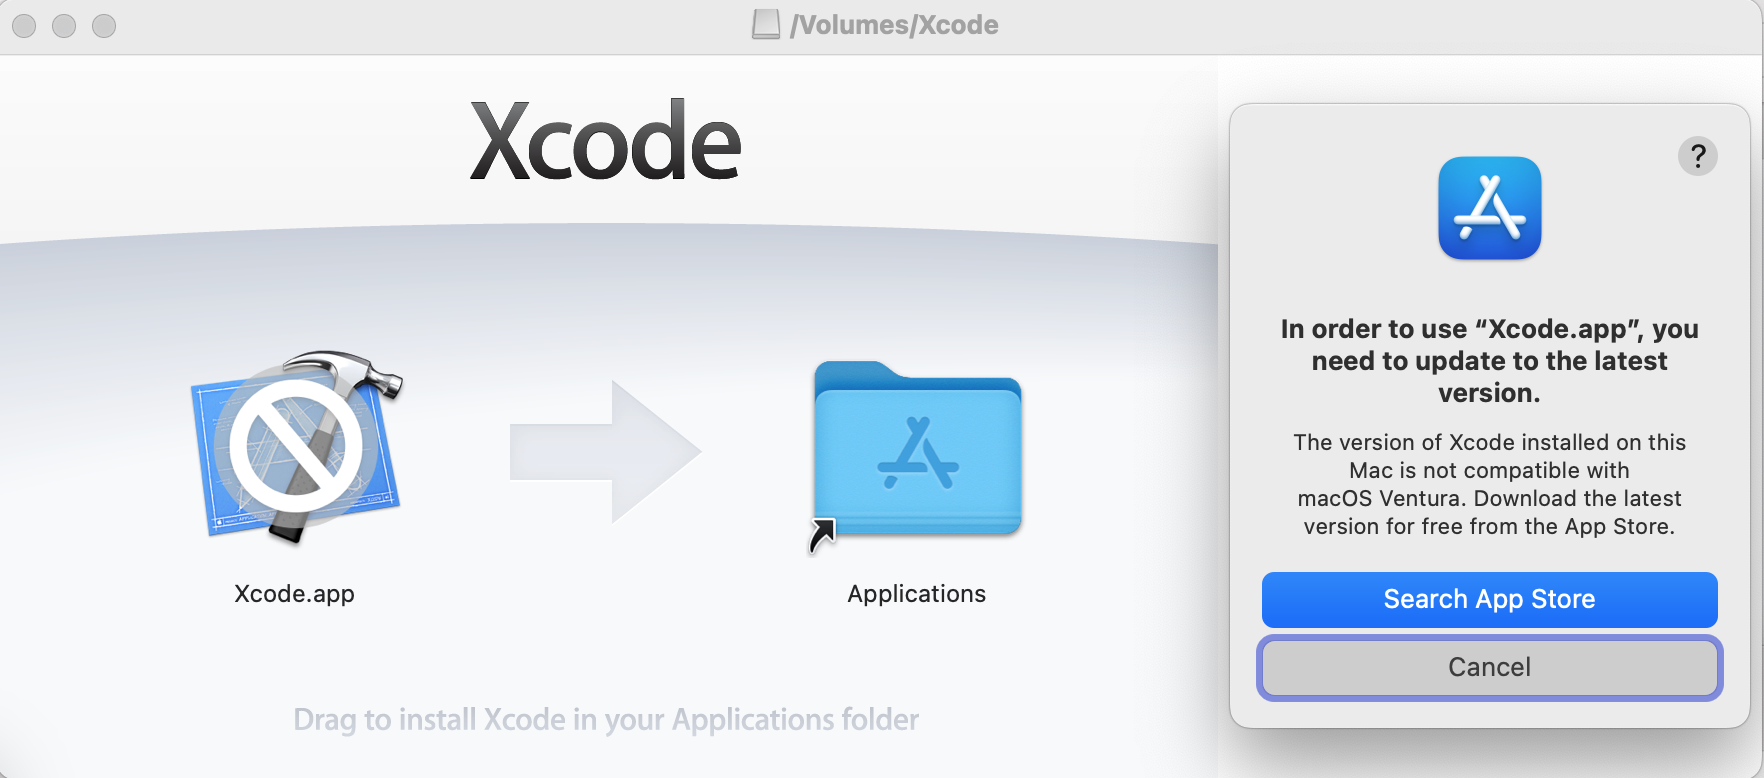
Well, bugger that. I download a few older Mac OS X versions that I intend to set up in a VM so that I can run an older Xcode version, then realize I’m bored. Even if I did manage to set up an old toolchain, it’s unclear if Apple would even still sign a binary that was targeting a legacy iOS version. Let’s try something else.
Eventually, I decide to check out a boot ROM vulnerability. This has a few fun advantages, such as obviating the need to set up an old toolchain and work in a VM, since a boot ROM vulnerability is typically exploited by writing some code on a host machine that interacts with the device over USB.
I know that contemporary devices have a publicly known boot ROM exploit, and go to the iPhone Wiki to learn more. They helpfully have a section entitled Vulnerabilities and Exploits - great! I read through some of these, and see that limera1n has some exploit code right there on the Wiki page. It is quite appealing to just try this code and see what happens.
A digression on trust
The boot ROM, or SecureROM in Apple’s parlance, is the first stage of the iOS boot process, and bootstraps the next parts of the boot process. It’s the SecureROM’s responsibility to ensure that whatever it loads next is trusted - in other words, that it’ll only run the exact image that Apple has shipped and signed.
SecureROM will happily load one of two components, depending on what’s going on:
- If the device is doing a ’normal’ boot from the filesystem, SecureROM will boot a component called the
Low Level Bootloader, or LLB, from a disk partition on NOR. - If the device is in DFU mode and is connected to a computer via USB, the
Restore iPhoneprocess can be initiated by sending the iBSS (iBoot Single Stage) bootloader.
Just like SecureROM had the responsibility for checking that the LLB or iBSS was trusted, both LLB and iBSS similarly must ensure that what they load next is trusted, too. Each successive stage makes sure that it trusts the one that comes after it. The flow for the Restore Process looks roughly like this:

This is our chain of trust: each stage will only load something that it trusts, and therefore the final user-facing code is always trusted.
That is, unless we break this chain! Note that every successive stage is verified by the previous stage, except for the first stage. Our diagram really looks like this:

The SecureROM is implicitly trusted, and it’s a heavy burden. While all the other stages can be swapped out if any vulnerabilities are found by releasing an updated iOS version, the SecureROM is etched into read-only memory when the device is manufactured. This means that every device manufactured with a given SecureROM version will be permanently vulnerable to any issues in that version.
And, as it turns out, such vulnerabilities do exist and can be exploited!
limera1n
limera1n is the name given to one such exploit that was released by geohot and packaged into an eponymous jailbreak tool in 2010. limera1n can be exploited when a DFU-mode device is waiting for an iBSS to be sent by the host over USB. The SecureROM that ships with the A4 SoC is vulnerable, so the iPhone 4 I’ve picked up should be a great target.
One thing that I find really fascinating about limera1n is that no one✱ knows exactly how it works. geohot said he has no idea why it works, and p0sixninja speculated theories. The tools to understand what’s going on are definitely there (especially after iOS 9’s iBoot source code leak), but to my knowledge no one has claimed to have put the pieces together. The crash that led to limera1n was found by fuzzing USB control messages, and appears to be a race condition that leads to a heap overflow, allowing the attacker to inject and run shellcode. Fuzzing closed-source binaries has given us a gift of alien technology: we can use it, it’s powerful, but we don’t know what it’s doing.
✱ Note
Reading data from a DFU-mode device
I started looking around for limera1n implementations to see how to replicate it. I quickly came across pod2g’s SecureROM dumper, which was immensely helpful. In one fell swoop, it showed me:
- How to implement limera1n
- What sort of code could go in the payload
- How to read memory from the device over USB
This last point was incredible. The SecureROM runs on the device, and if you want to analyze it you’ll need to get it off the device somehow. pod2g’s SecureROM dumper copies the memory where the SecureROM is mapped (0x0) to the USB receive-area. Then, on the host side, it sends USB control messages to read data from the device.
To my knowledge, no one has explicitly written up the second half of that: not only can you write data to an iOS device over USB, the device will also respond to read requests. I found this quite surprising, as I was imagining the device to be a black hole that’d suck in bits and never reveal a thing about its own state.
This mechanism isn’t explained anywhere online that I can see. Here’s my understanding:
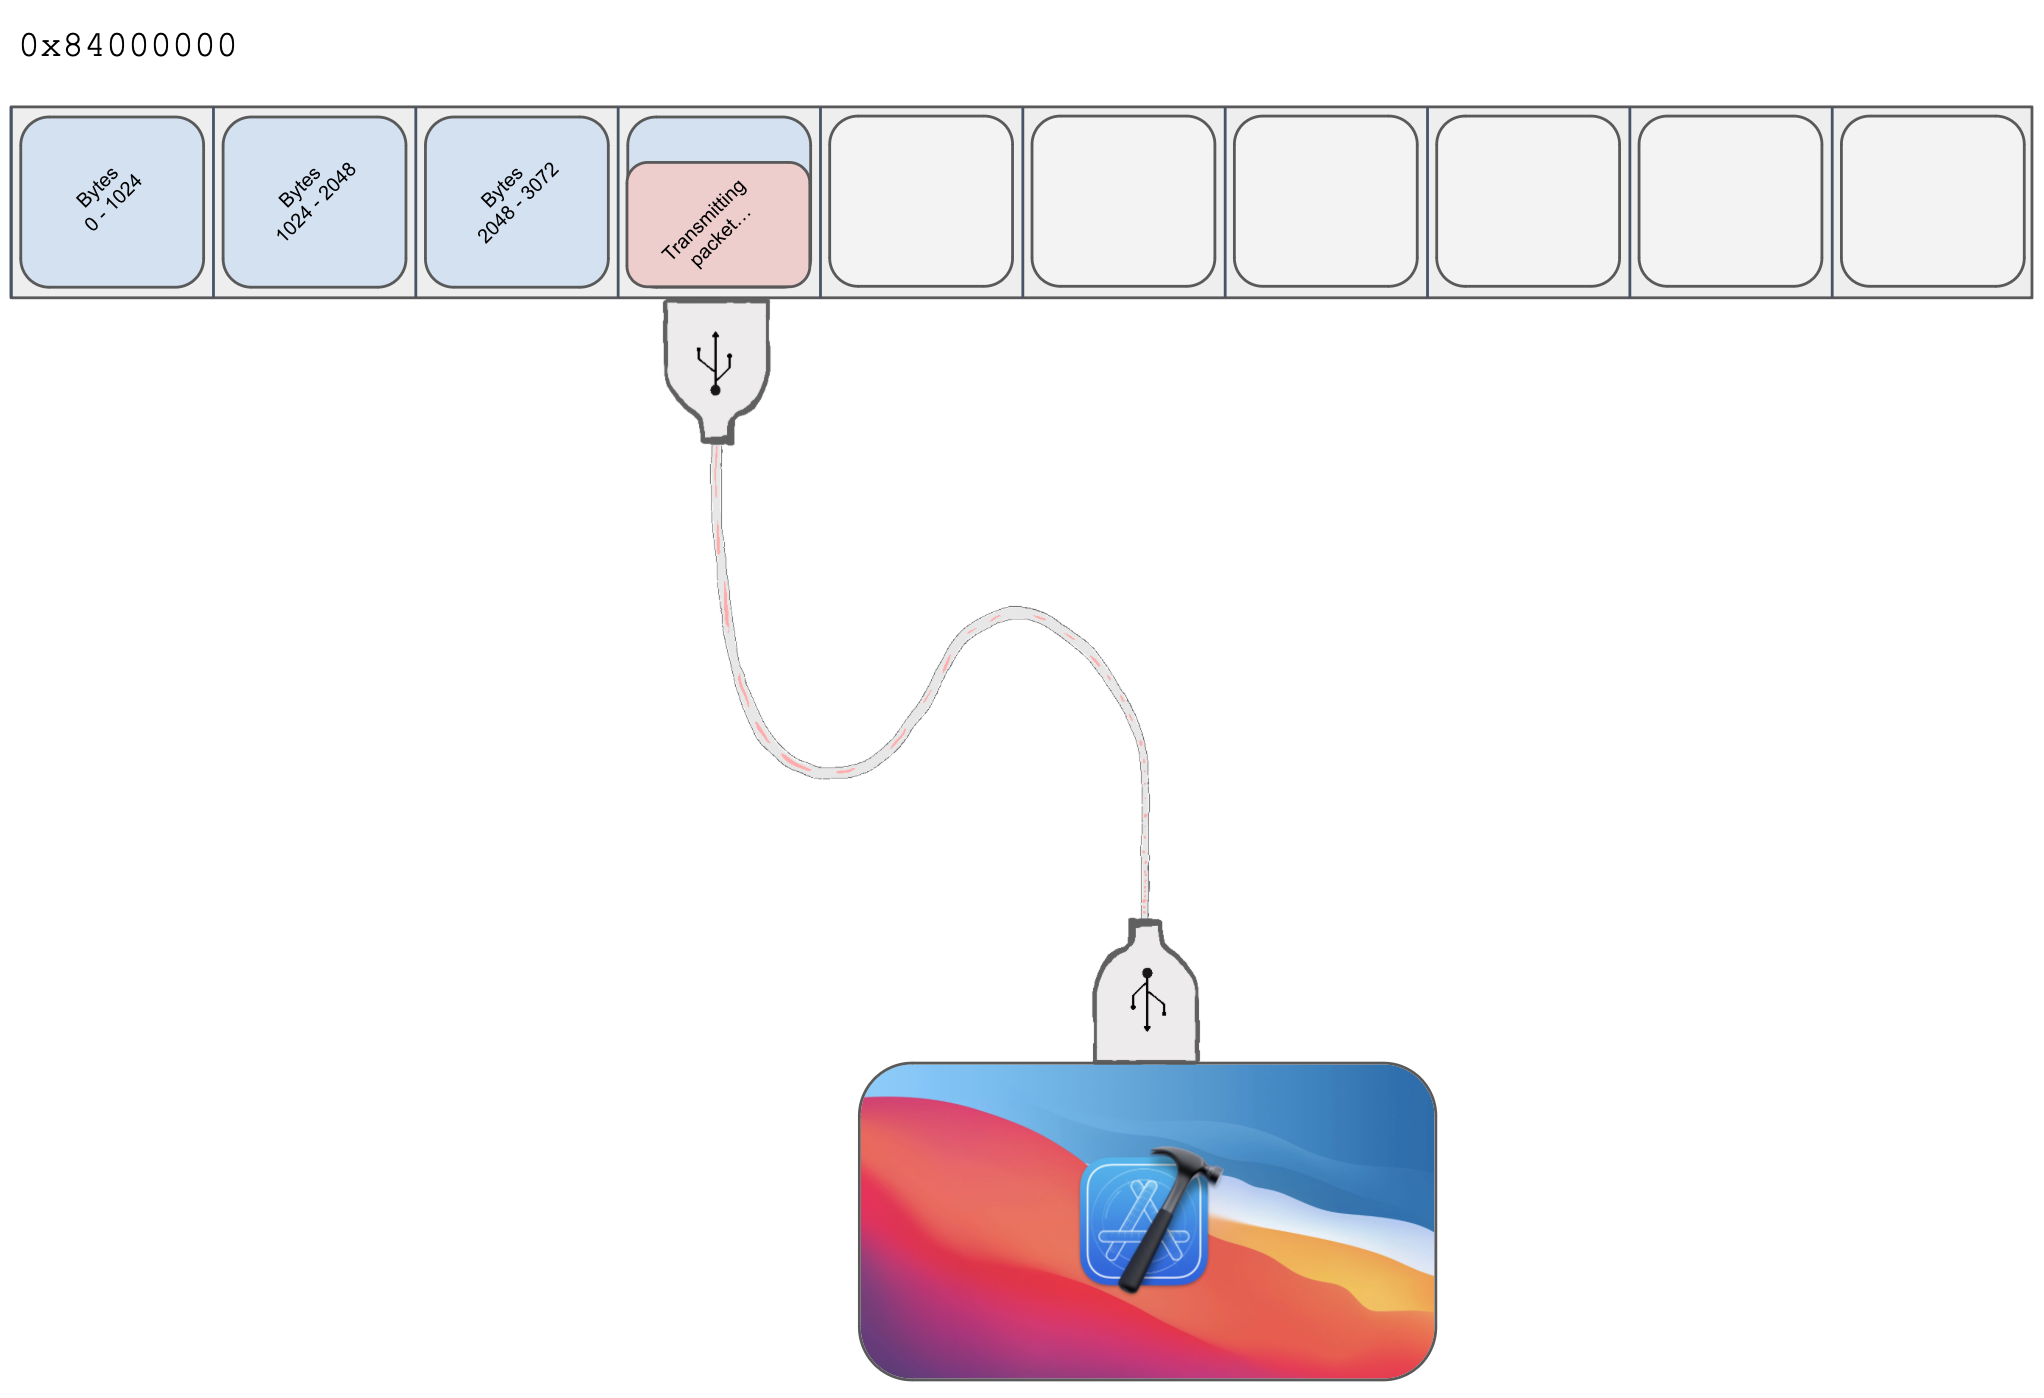
- The A4’s MMU maps the base of SRAM to
0x84000000. - Hosts talking to the DFU device (such as Apple software running on a Mac to restore an iPhone) can send an iBSS image piecewise by sending USB control packets with a request type of
0x21and a request ID of1. The data sent in the control packets will be copied to SRAM, starting from0x84000000and shifting to higher addresses as the host sends more packets (as to not overwrite prior data). The SecureROM maintains some internal counters tracking where the next packet should be copied to, and these counters can be cleared (presumably if the host wants to cancel a transfer and start over).
- The device will also respond if the host sends a control packet with
request type 0xA1, request ID 2. The device will read the contents of memory at0x84000000and send it to the host. This seems dubiously useful if this memory ostensibly just contains whatever data the host itself has already sent over, but becomes really handy when we have the ability to execute code on-device and can copy anything we like to0x84000000.
- The dumper above therefore uses limera1n to execute a payload that copies the memory at
0x0(which contains the SecureROM) to0x84000000, then returns back to the original SecureROM DFU loop. The host then sends someA1:2read requests, essentially pulling a dump of the SecureROM from the device.
I don’t know much about USB yet✱, so I’m curious if 0x21:1 and 0xA1:2 have any deeper significance, or if they’re arbitrary values hard-coded in the SecureROM’s business logic. One Stack Overflow post implies they encode some standard information:
✱ Note
The first byte (bmRequestType) in the setup packet consists of 3 fields. The first (least significant) 5 bits are the recipient, the next 2 bits are the type, and the last bit is the direction.
p0sixninja gave a presentation about this utility in 2013 at Hack In the Box Malaysia, but as far as I can tell there’s a bug in his slides: he says that pod2g’s SecureROM dumper is built around an implementation of SHAtter (another SecureROM exploit developed contemporaneously with limera1n), but pod2g’s utility actually uses a limera1n implementation.

I wrote my own limera1n implementation based on pod2g’s SecureROM dumper, and tried dumping the SecureROM too. I was thrilled when it worked!
$
Writing a payload
I’ve now got code execution on this iPhone 4, and I’m ready to go off in my own direction. For starters, I can run assembly, but it’s unclear where this assembly is running. Where’s my stack? What memory is my shellcode overwriting? What are the limits for how big my shellcode program can grow before I start overwriting something important in memory?
Before we can answer any of these questions, we’ll need some way to get debug data off the device. The ‘read memory at 0x84000000’ flow used in the SecureROM dumper seems like a really useful tool for this! I wrote some shellcode that copies the values of the instruction pointer and stack pointer to 0x84000000, then used the same host-side code to read the values back. This way, I made a poor man’s print() that allows me to communicate information that I’m gathering on-device by way of memory dumps that I’m receiving on the host.
securerom_payload.rs
    let communication_area_base = unsafe {
        slice::from_raw_parts_mut(0x84000000 as *mut _, 1024)
    };
    communication_area[0] = pc;
    communication_area[1] = sp;
I made some scripts to automatically run my exploit and dump the first few words of 0x84000000 to an output window, so I could inspect the copied instruction pointer and stack pointer values. These scripts allowed me to quickly iterate after making changes to my shellcode.


$
<wait>
Looking at the first two words of the dumped memory, we can see that our shellcode is running around 0x8402b048 (48b00284 in the memory dump), and the stack pointer is at 0x8403bfa0 (a0bf0384). This makes sense! The stack pointer is within the normal stack region that the SecureROM itself sets up, and the instruction pointer is within the receive-image area. Since we exploited an overflow to gain code execution, seeing our code running from within the delivery buffer isn’t surprising.
Climbing from assembly
While I was making my life better, I also made the payload’s logic easier to develop. Writing software directly in assembly is useful in some circumstances, but here it’s just an impediment. I set up a build system that allowed me to write a payload in Rust✱ that would then be converted to shellcode and sent to the device. I chose Rust because I knew that I’d one day write up this work into a blog post, and that choice would garner the most eye-rolls. Plus, how cool is it to run a Rust exploit payload on a device that was manufactured before Rust existed?!
✱ Note
armv7-apple-ios target in early 2020, but it’s easy to switch back to an older, supported toolchain with rustup.Writing shellcode in any higher-level language imposes some extra difficulties that aren’t present when shipping assembly, though. It’s important to remember that when you compile code in a high-level language, you don’t get raw machine code out: instead, toolchains will compile your code into a binary that contains tons of metadata including (among other things) instructions to the OS about how to set up the virtual address space in the way the program expects, symbol tables for debugging, and linker information. We don’t want any of that here! Our exploit gives us the ability to inject some bytes into memory and jump to them, and we don’t want all the accoutrements that normally come with compiling a binary in a controlled environment. This is the wild west, baby, and we’re programming the weird machine.
On macOS, binaries normally have a layout like the following:
In other words, the binary (laid out in the Mach-O format) is a collection of segments, each of which contains a section representing some data or other. One section might be for storing Objective-C metadata, while another might be for storing statically embedded C strings. Only one of these sections contains the raw machine code that we’ll want to upload to the iPhone: the __text section in the __TEXT segment. As it happens, I wrote strongarm, an extensive Mach-O analysis library, so I added a quick script to the build system: it compiles the payload and links it into a Mach-O, then uses strongarm to extract the contents of the __TEXT,__text section and dumps it to a file. The contents of this file are then what we use limera1n to execute on-device.
dump_shellcode.py
from strongarm.macho import MachoParser


def dump_text_section_to_file(input_binary: Path, output_file: Path) -> None:
    with open(output_file.as_posix(), "wb") as f:
        f.write(dump_text_section(input_binary))


def dump_text_section(input_file: Path) -> bytes:
    parser = MachoParser(input_file)
    binary = parser.get_armv7_slice()
    text_section = binary.section_with_name("__text", "__TEXT")
    return binary.get_content_from_virtual_address(text_section.address, text_section.size)
Appeasing the linker
We’re not compiling a typical binary here, and typical binaries have an agreement with the OS infrastructure about what their entry point will be called. By default, the linker expects that our binary will define the start or _main symbols, which aren’t necessary for our use case. Unless we tell the linker that we’re doing something unorthodox, it’ll halt us in our tracks and complain that standard symbols are missing.
$ as -arch armv7 entry.s -o entry.o
$ ld entry.o
Undefined symbols for architecture armv7:
"_main", referenced from:
implicit entry/start for main executable
ld: symbol(s) not found for architecture armv7
Let’s tell the linker we won’t provide these and give it a try!
$ ld entry.o -U _main
ld: dynamic executables or dylibs must link with libSystem.dylib for architecture armv7
Whoops, now ld thinks we’re compiling a dynamic library. Well, that’s fine. Will it pipe down if we tell it we’ll link with libSystem.dylib? Let’s give it a try!
$ ld entry.o -U _main -framework libSystem.dylib -o output.o
ld: framework not found libSystem.dylib
Let’s… let’s take it slow. It’s fair enough that libSystem.dylib isn’t available when cross-compiling to armv7, and we don’t have an iOS 4 sysroot handy. I see a promising option in the manual.
-static
    Produces a mach-o file that does not use the dyld.  Only used building the kernel.
Well, we’re definitely not building the kernel here. We are building a binary that doesn’t use dyld. Could we…? No, no, of course not… but maybe?
$ ld entry.o -U _main -o output.o -static
Undefined symbols for architecture armv7:
"start", referenced from:
-u command line option
ld: symbol(s) not found for architecture armv7
Cool, that’s progress! Let’s just tell the linker we’re not going to define start either…
$ ld entry.o -U _main -U start -static -o output.o
# Success
Great! Now we pipe it into strongarm to extract contents of __TEXT,__text…
Traceback (most recent call last):
  File "payload_stage1/../dump_shellcode.py", line 15, in dump_text_section_to_file
    f.write(dump_text_section(input_file))
  File "payload_stage1/../dump_shellcode.py", line 7, in dump_text_section
    parser = MachoParser(input_file)
  File "strongarm/macho/macho_binary.py", line 847, in dyld_info
    raise LoadCommandMissingError()
strongarm.macho.macho_binary.LoadCommandMissingError
Uh oh, strongarm crashed! This is because, during its initial analysis of the binary, strongarm is expecting to find the LC_DYLD_INFO load command. Since we created a standalone binary that doesn’t use dyld at all, this load command isn’t present. It wasn’t handled because I’ve never encountered a binary like this before: most binaries use dyld! I added a quick patch to strongarm to handle this, and now everything’s dandy.
Remembering our limitations
Over the course of extending the payload, I started including quite a few values in the memory dump. It became a bit difficult to remember “word 3 is the return value of this call, word 7 is the address of that function”, and so I made an essentially benign change to include some strings in the data that I placed in the communication space. The code looks something like this:
securerom_payload.rs
    let communication_area_base = unsafe {
        slice::from_raw_parts_mut(0x84000000 as *mut _, 2048)
    };
    let mut cursor = 0;
    write_str(
        communication_area_base,
        &mut cursor,
        "Output from image3_decrypt_payload: ",
    );
    write_u32(
        communication_area_base,
        &mut cursor,
        ret
    );
Let’s try it out!
$
Hm, that’s odd. It sure looks like that broke something. The reason becomes quite clear when we take a closer look at our payload binary, prior to extracting its __TEXT,__text contents:
Oh! The static string in our source code was placed in __const, and our compiled Rust code tries to access the string by loading the memory at the address where the binary requests the string to be placed within the virtual address space. Since we completely throw away everything except for __TEXT,__text, these virtual address space mappings are an impotent request by the binary, and the data in __const is never loaded into memory. Therefore, our code is asking to load a string from a completely unmapped address, and our binary crashes. The fix is pretty straightforward, and does provide one good reason to use assembly to write our payloads: assembly gives the programmer explicit and direct control over the layout of static data, while compiled languages try to handle it on the programmer’s behalf.
To fix this, we’ll need to make sure any static data we define is embedded in __TEXT,__text to be sure it’s not lost when we extract the shellcode. We’ll also need to be careful that any accesses to static data use instruction pointer-relative addressing, rather than absolute addresses, as we can’t rely on being loaded at any stable memory address. For now, I’m defining any strings I want to use in assembly, and passing their addresses to the Rust payload entry point:
securerom_payload_entry.s
.text

shellcode_start:
    adr r0, msg1
    mov r1, msg1_len
    bl _rust_entry_point

# ...

msg1:
.asciz "Output from image3_decrypt_payload: "
msg1_len:
.equ . - msg1
We’re in a pretty good place! We’ve now got this pipeline:
- Make a modification to the Rust payload
- Press a button
- The payload will be compiled
- The shellcode will be extracted from the binary
- The runner will use limera1n on the connected DFU iPhone to execute the payload
- The runner will automatically read data from
0x84000000, which we’re using as a communication space, and present it in a hexdump
What’s next? From here, we can do pretty much anything, since we can run arbitrary code on the device. From one point of view, it’s ‘game over’. From another view, though, the fun has only just begun. It’s one thing to be able to do anything in theory. It’s an entirely different beast to actually make the device do something interesting. Read more in Part 2: Bypassing the Bootchain.